By default, your MooseDesk email address – support@moosedesk.com is set as your outbound email address. However, we recommend changing the default address to make your outbound emails appear as if they are coming from your company domain. This would improve the personalization and deliverability of your messages. This article will walk you through the steps to change the default outbound email address.
Change your default outbound email address #
Step 1: Navigate to “Settings “> “Channels” > “Email Configuration“
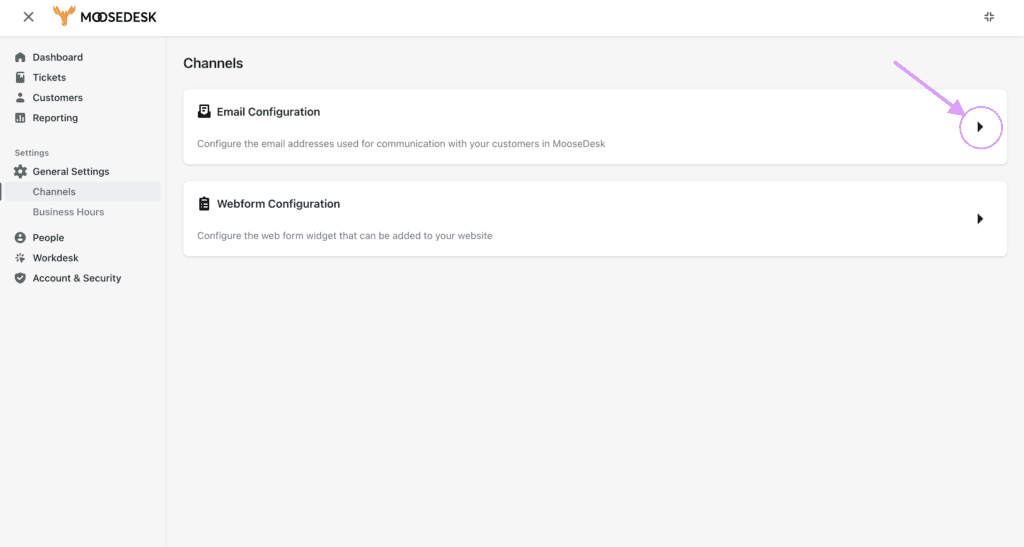
You will then be redirected to our standalone version outside of Shopify Admin.
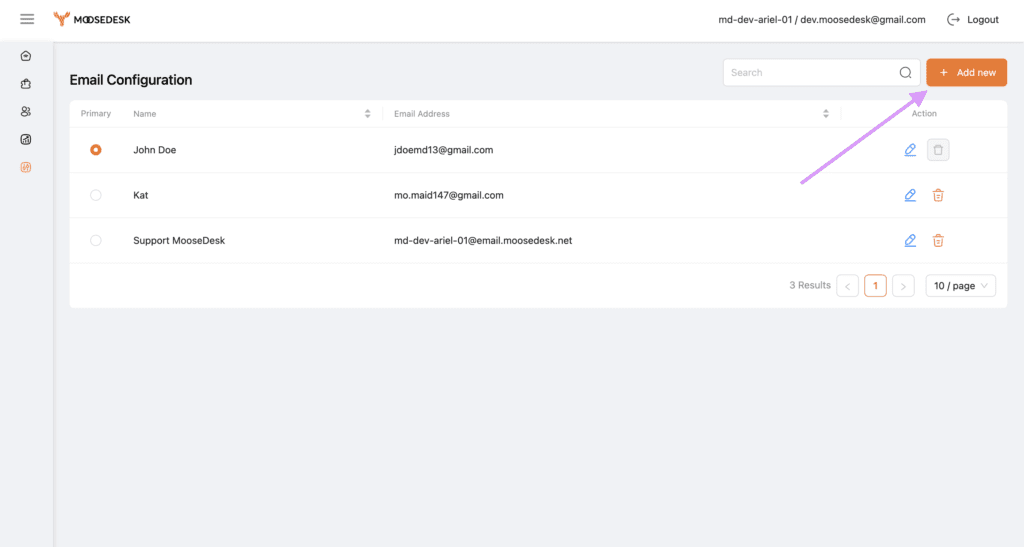
Step 2: Click “Add new” on the top right to start configuring the default address
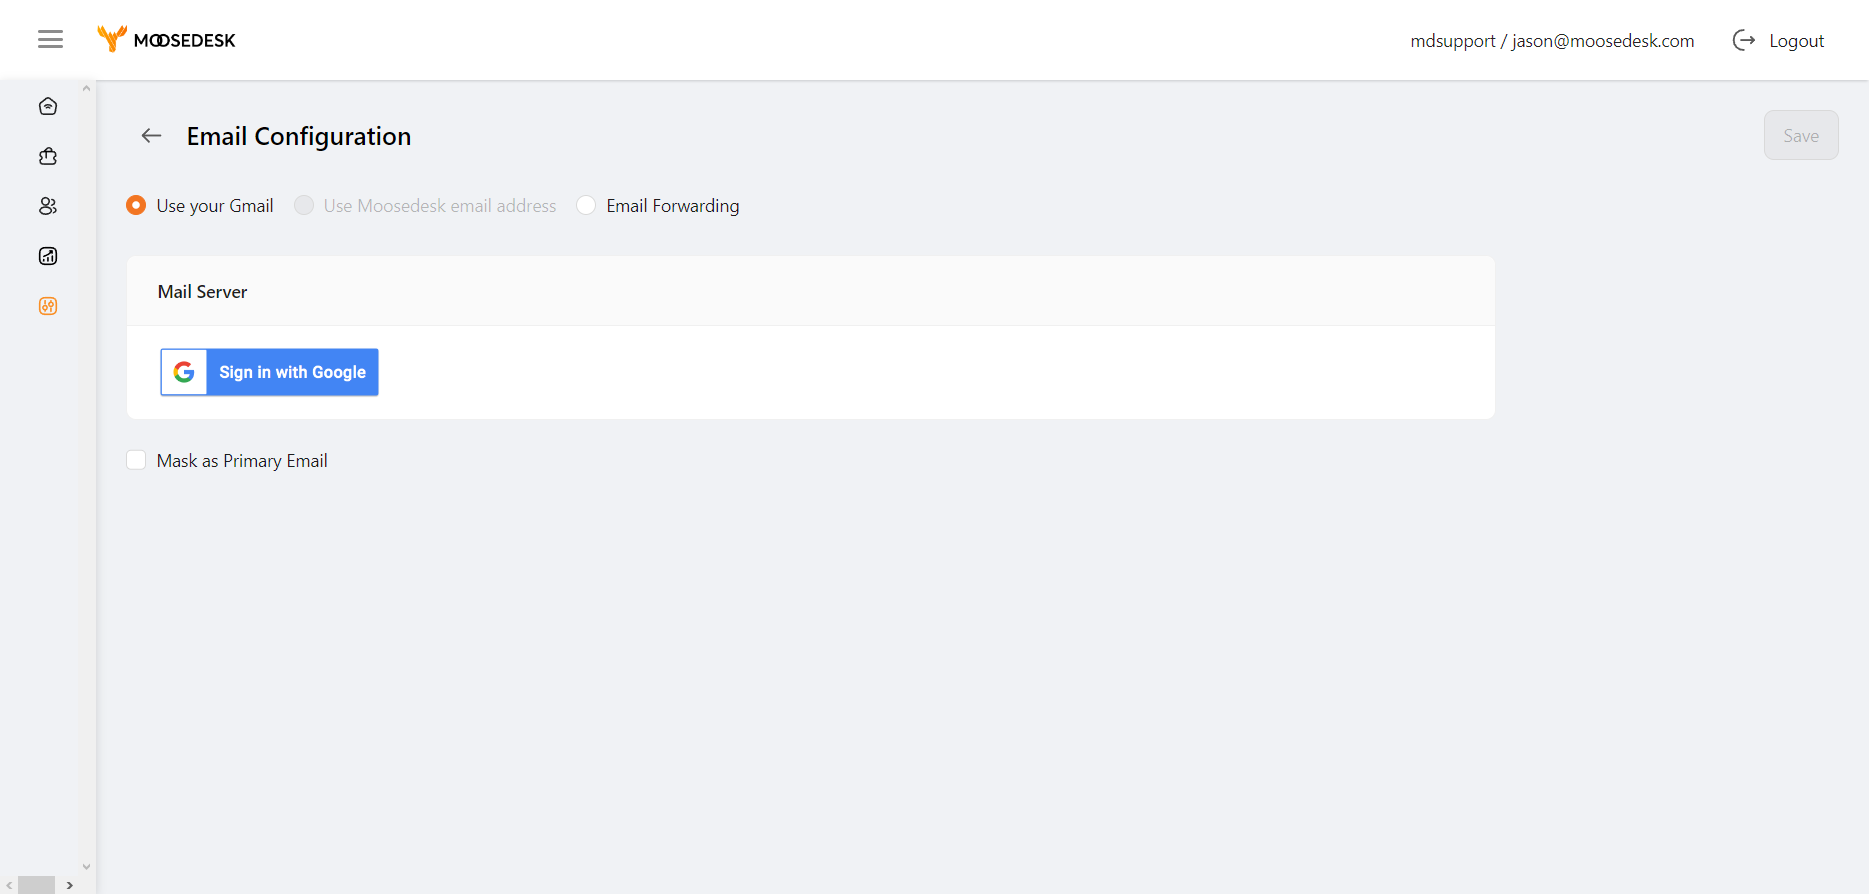
There are 3 ways you can configure the default outbound email address:
- Use your Gmail: Automatically sign in with any Google account you choose. Just click on “Sign in with Google” and choose which Gmail account you want to add to your MooseDesk system.
- Use MooseDesk Email Address: Select this option if you want to keep the default MooseDesk email address that has been automatically generated.
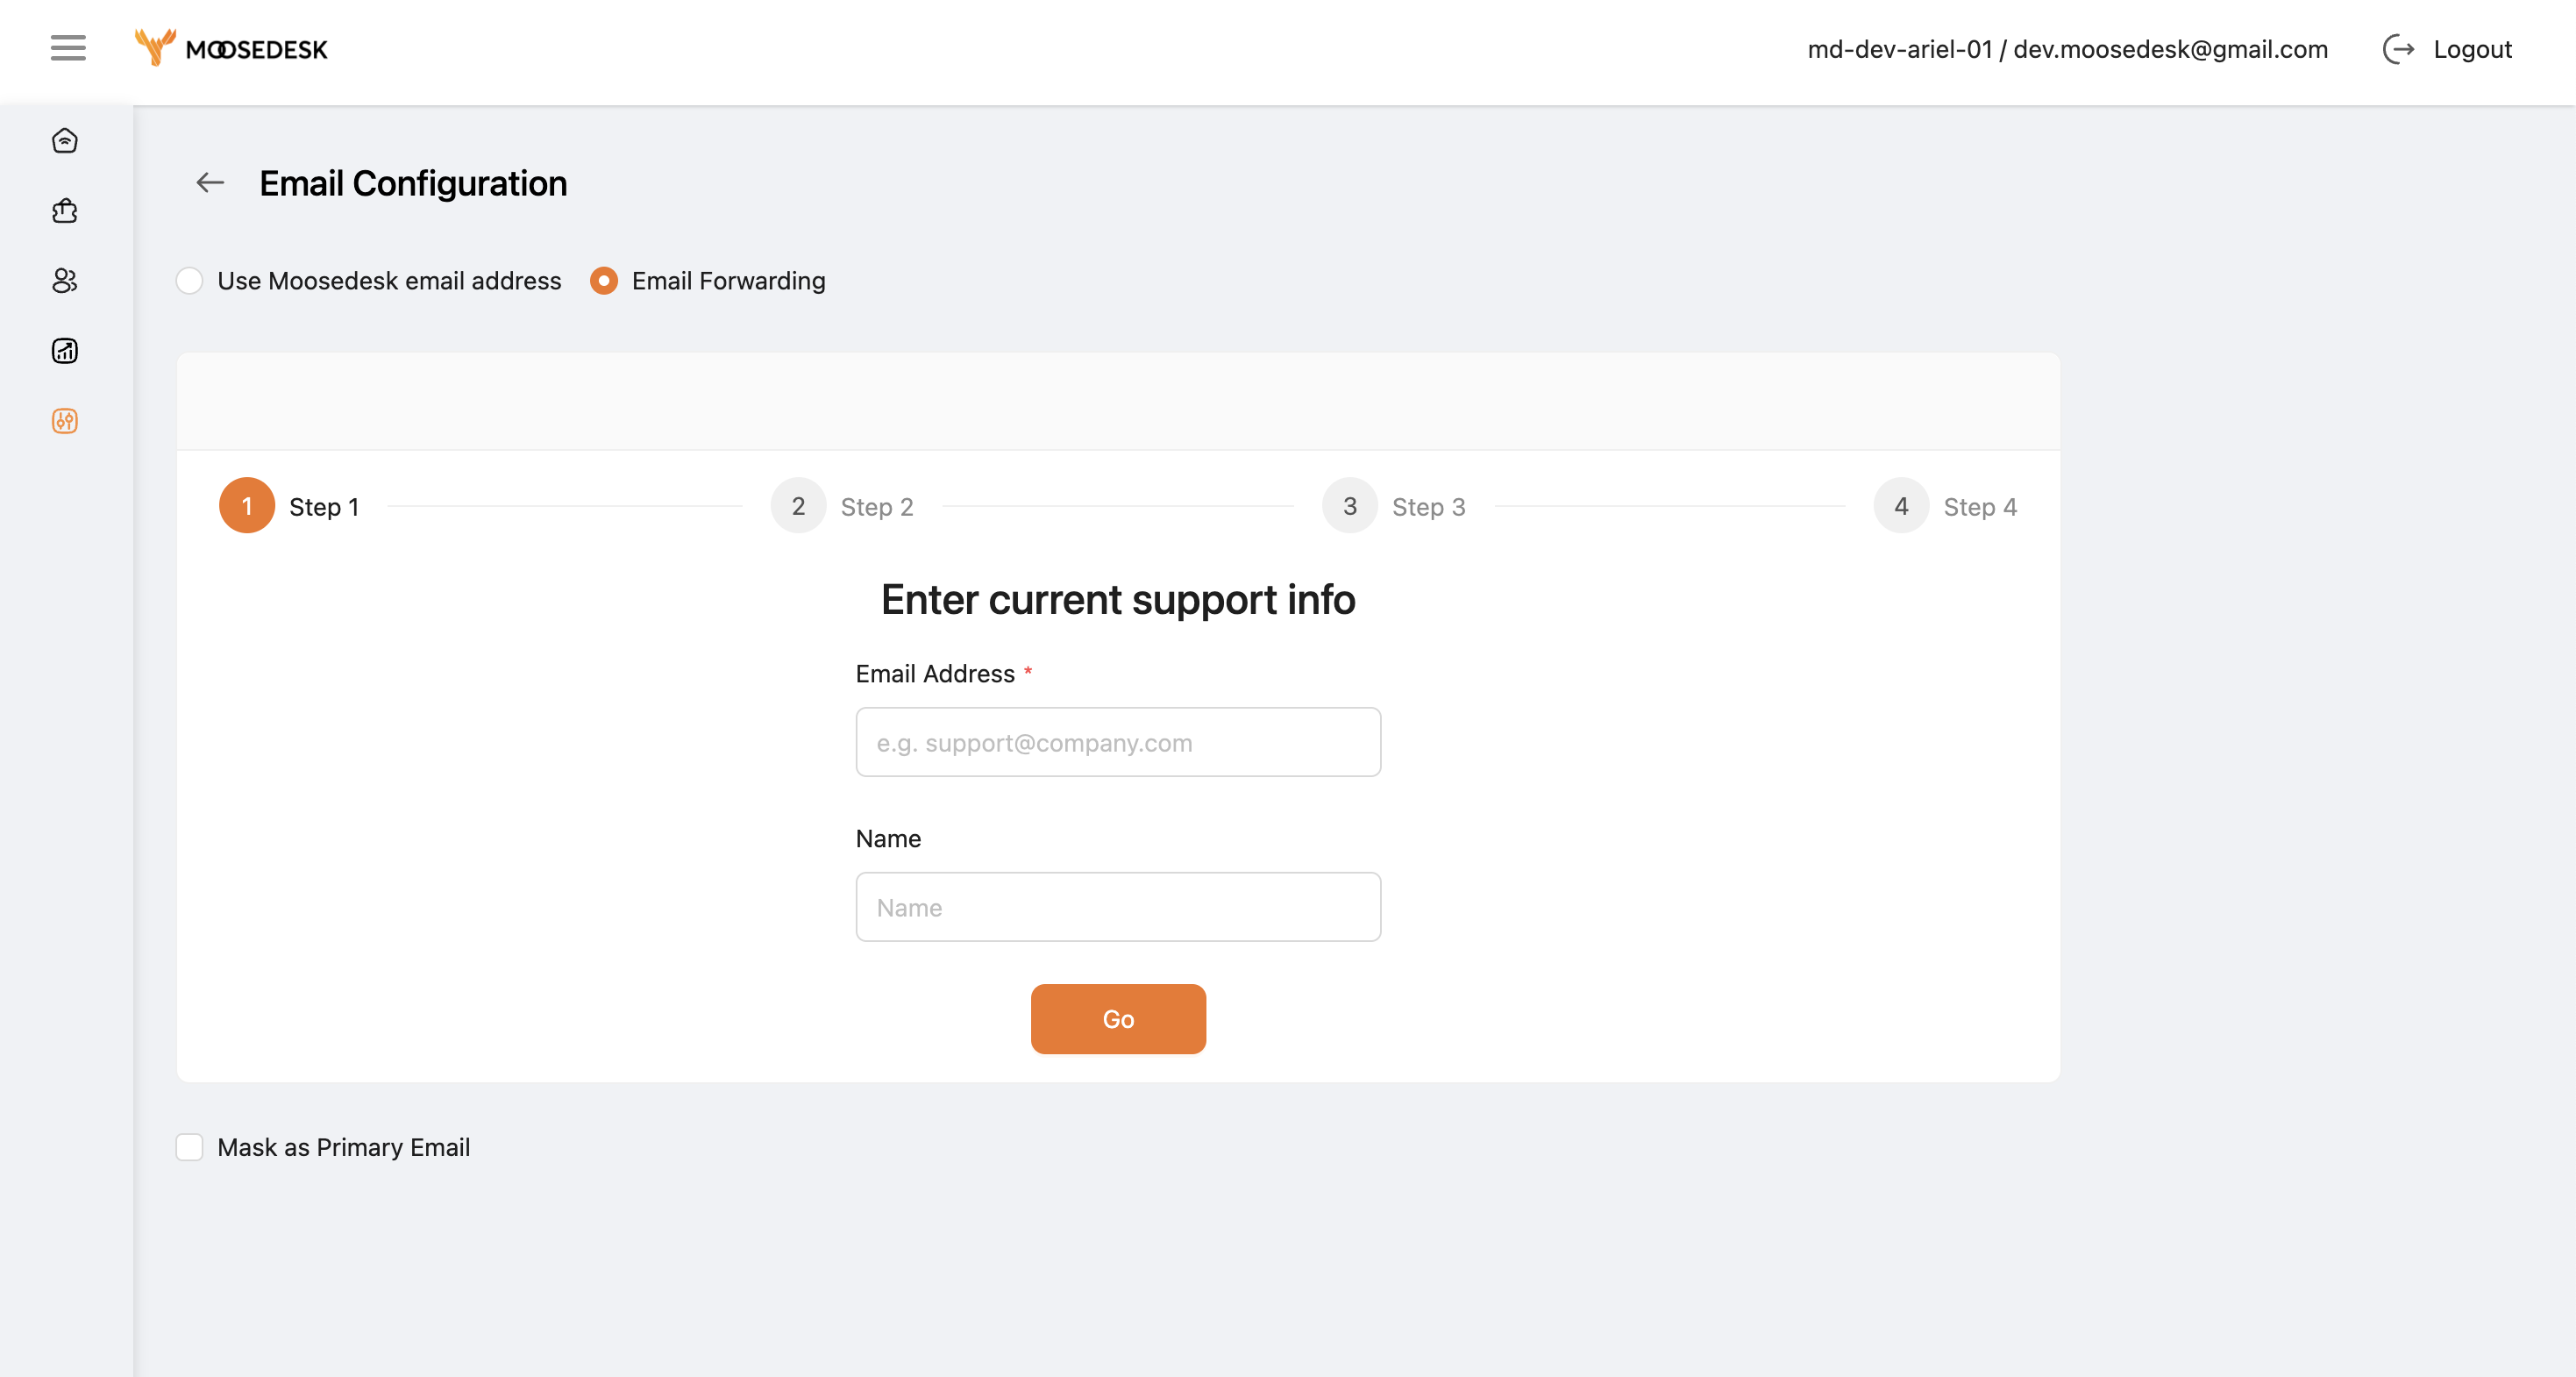
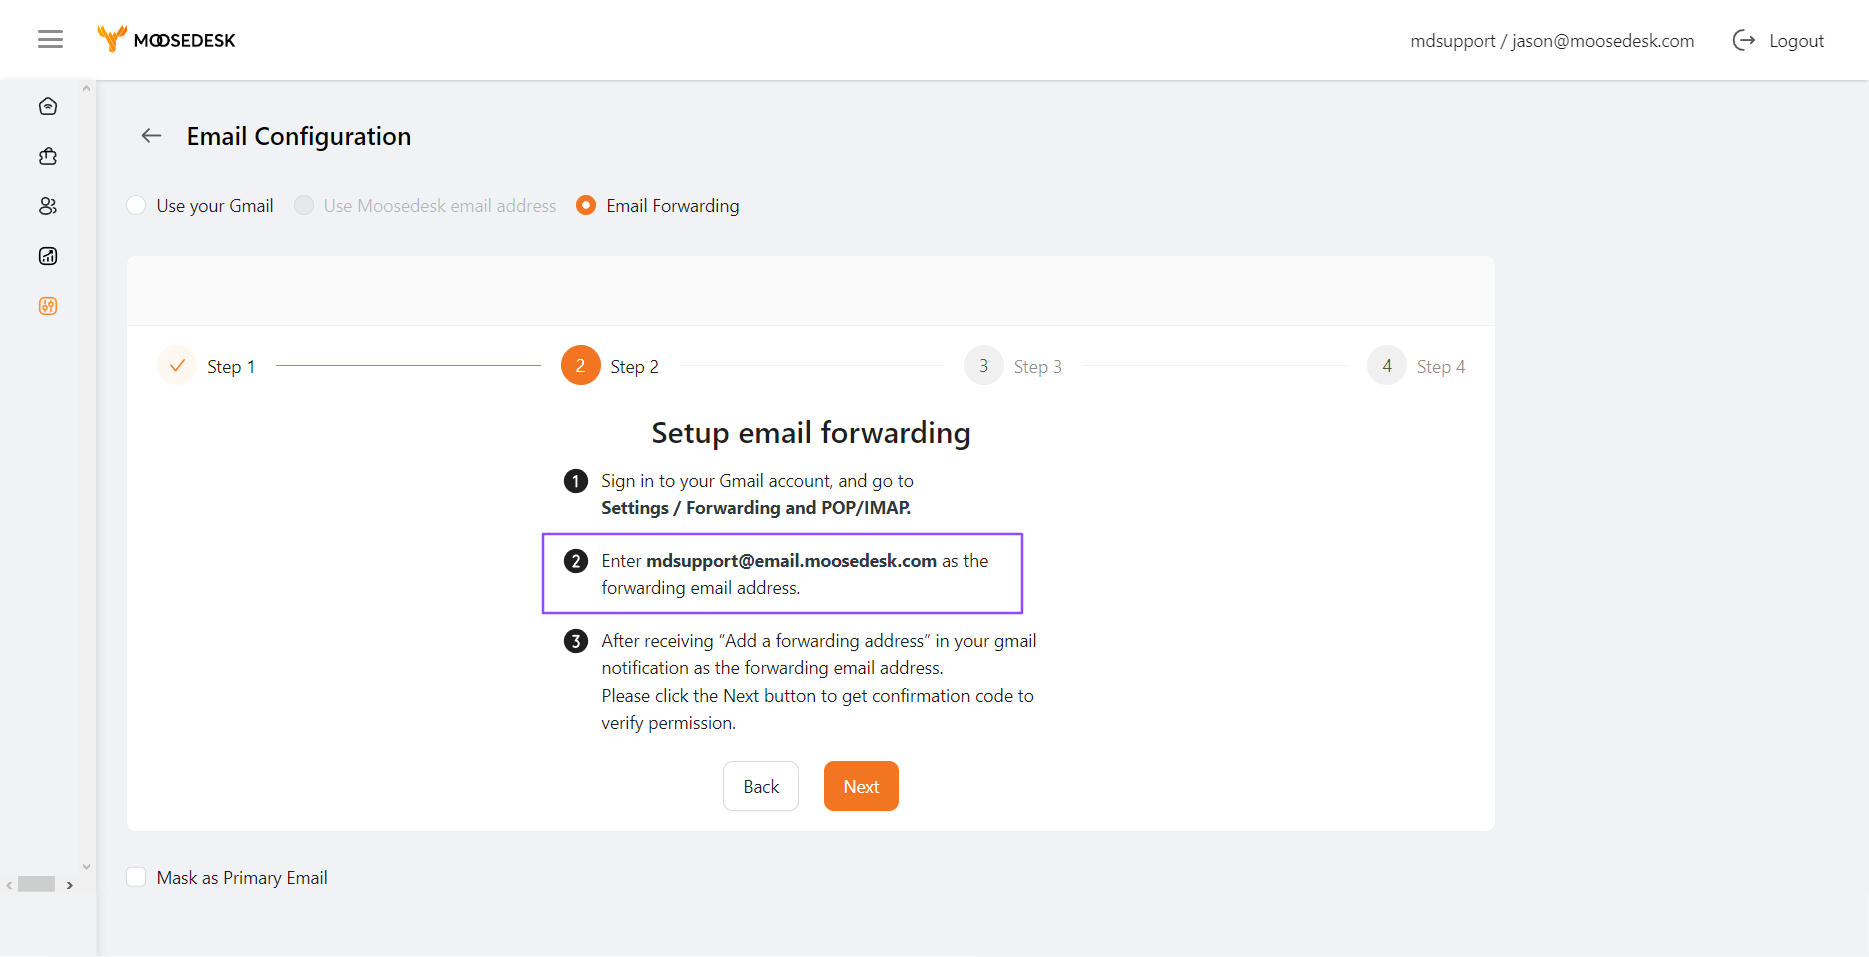
- Email forwarding: Manually add an email forwarding rule. You can follow these steps:
Step 1: Enter the email address you want to forward the tickets to MooseDesk and press “Next“
Step 2: Keep this tab open and go to your Gmail account in a new tab
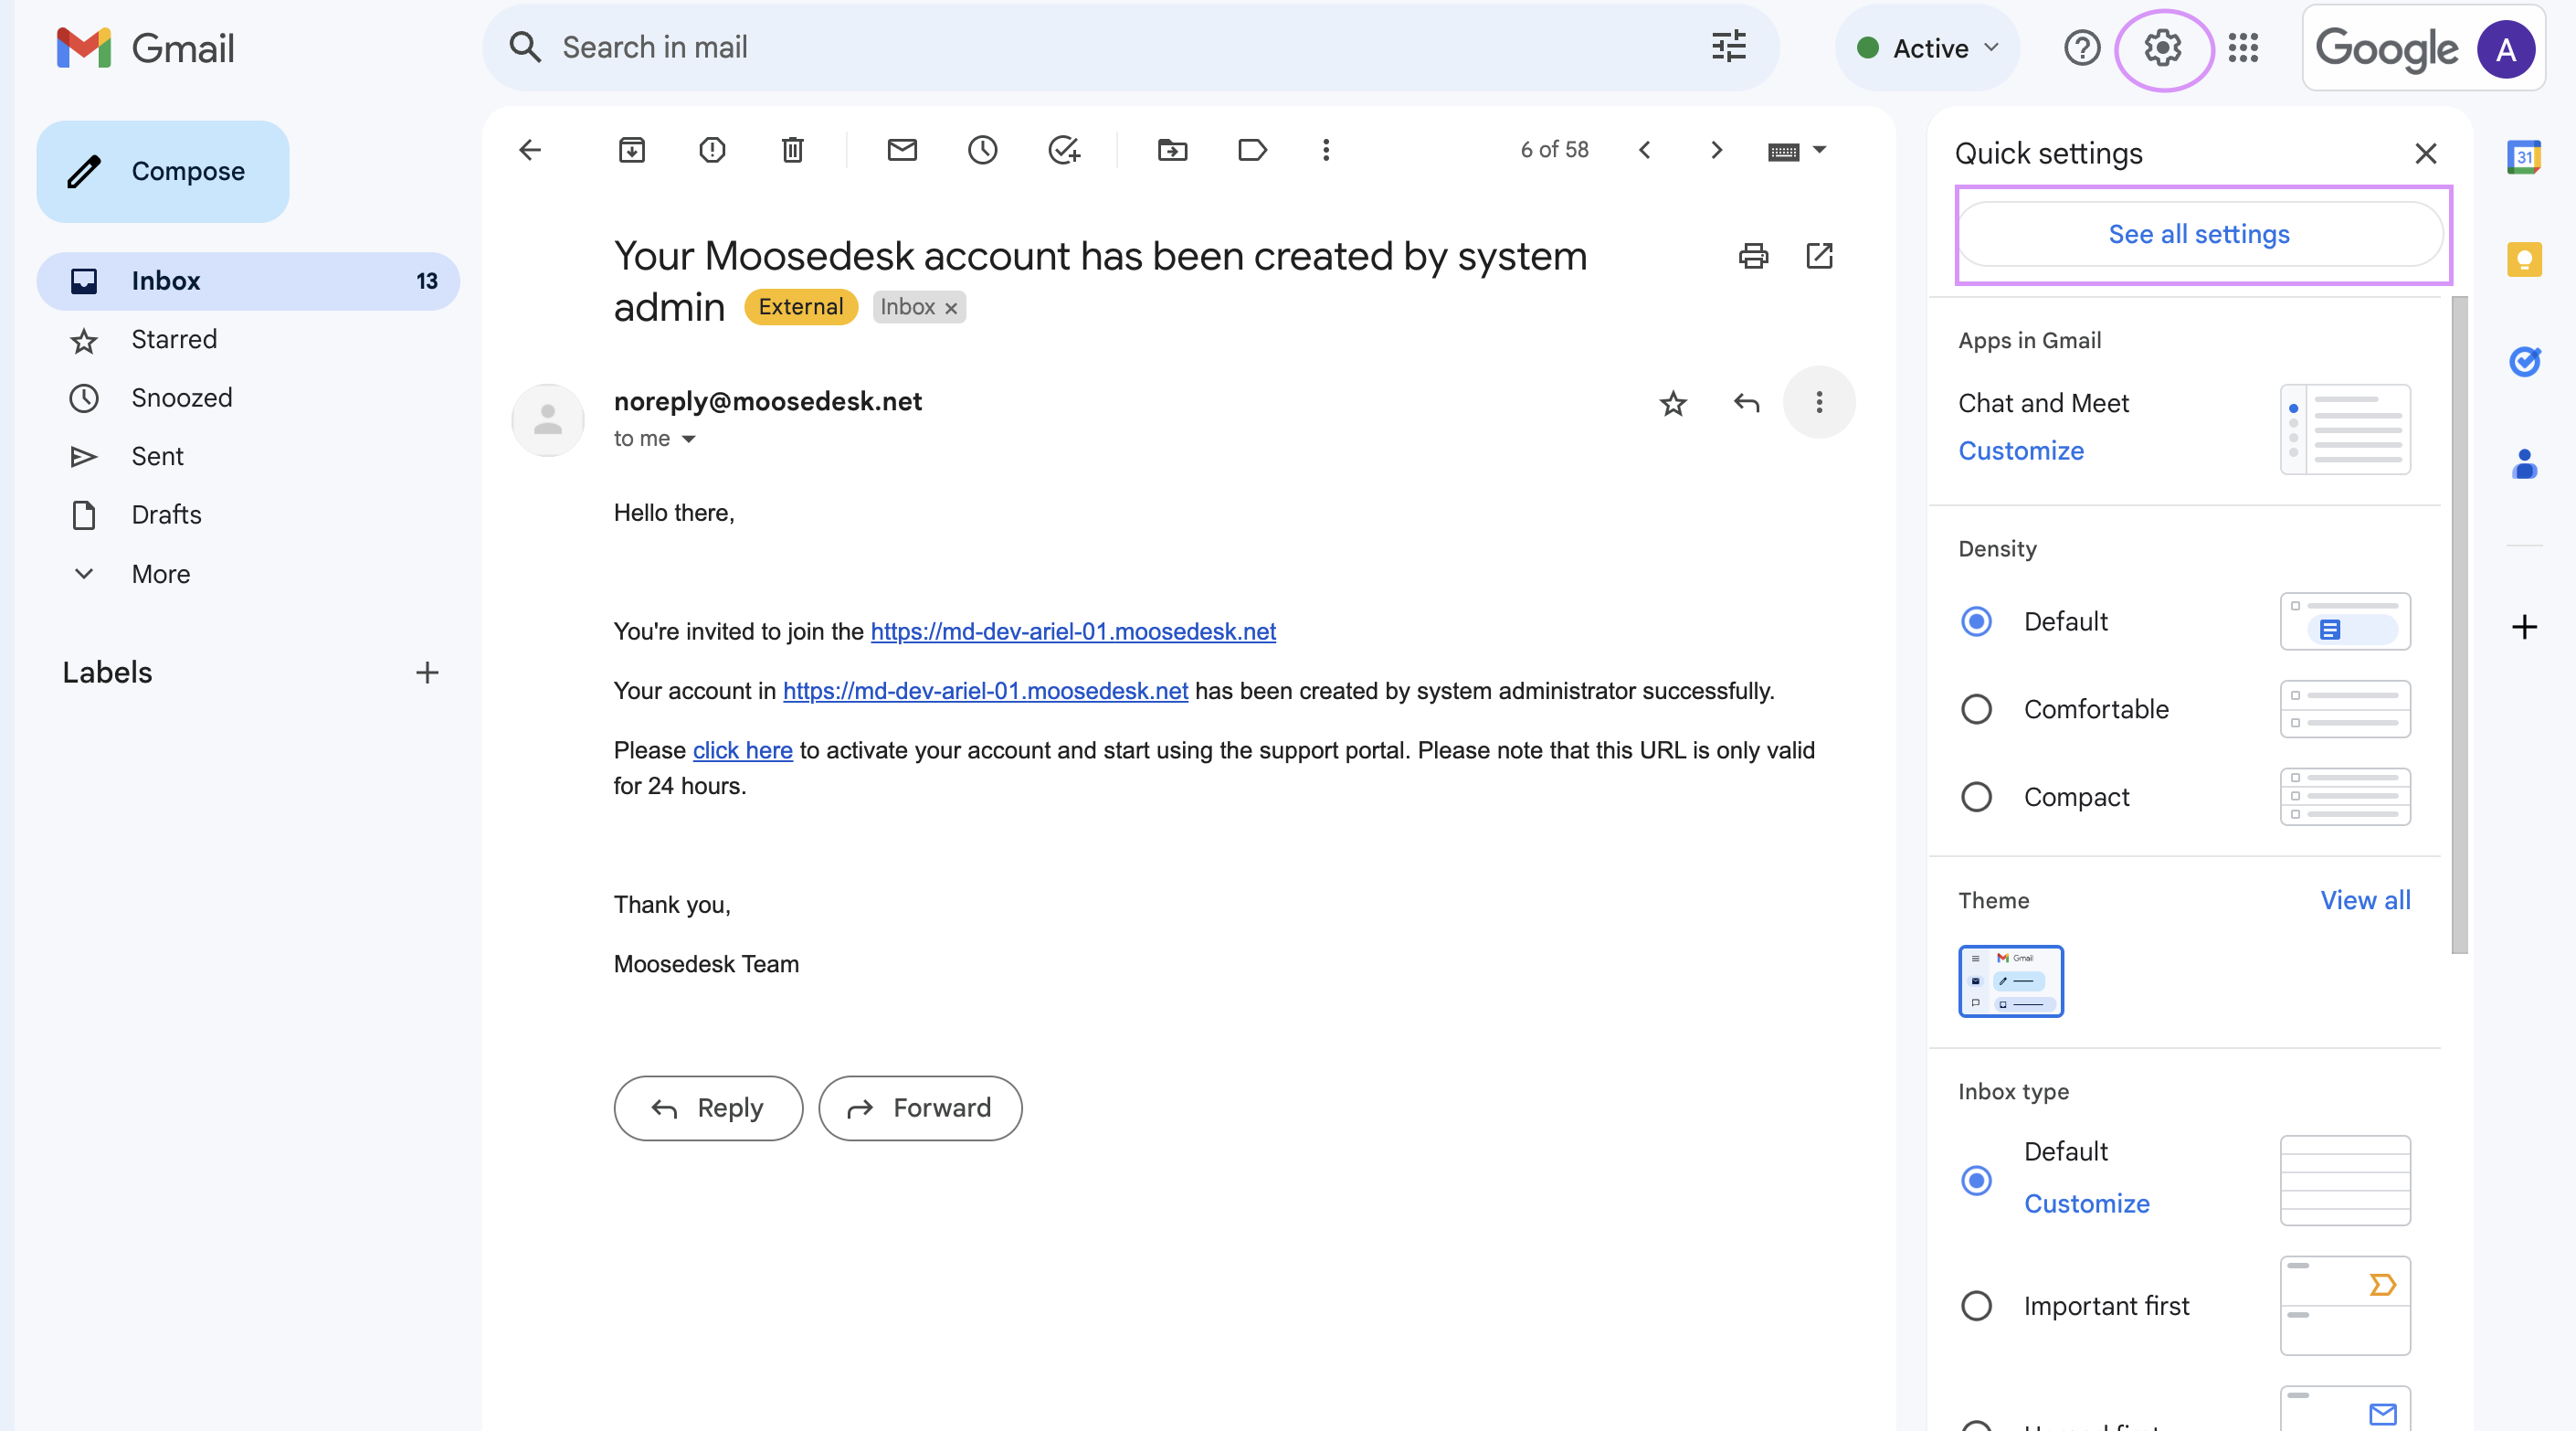
Step 3: Enter the settings of your Gmail account via “See all settings“
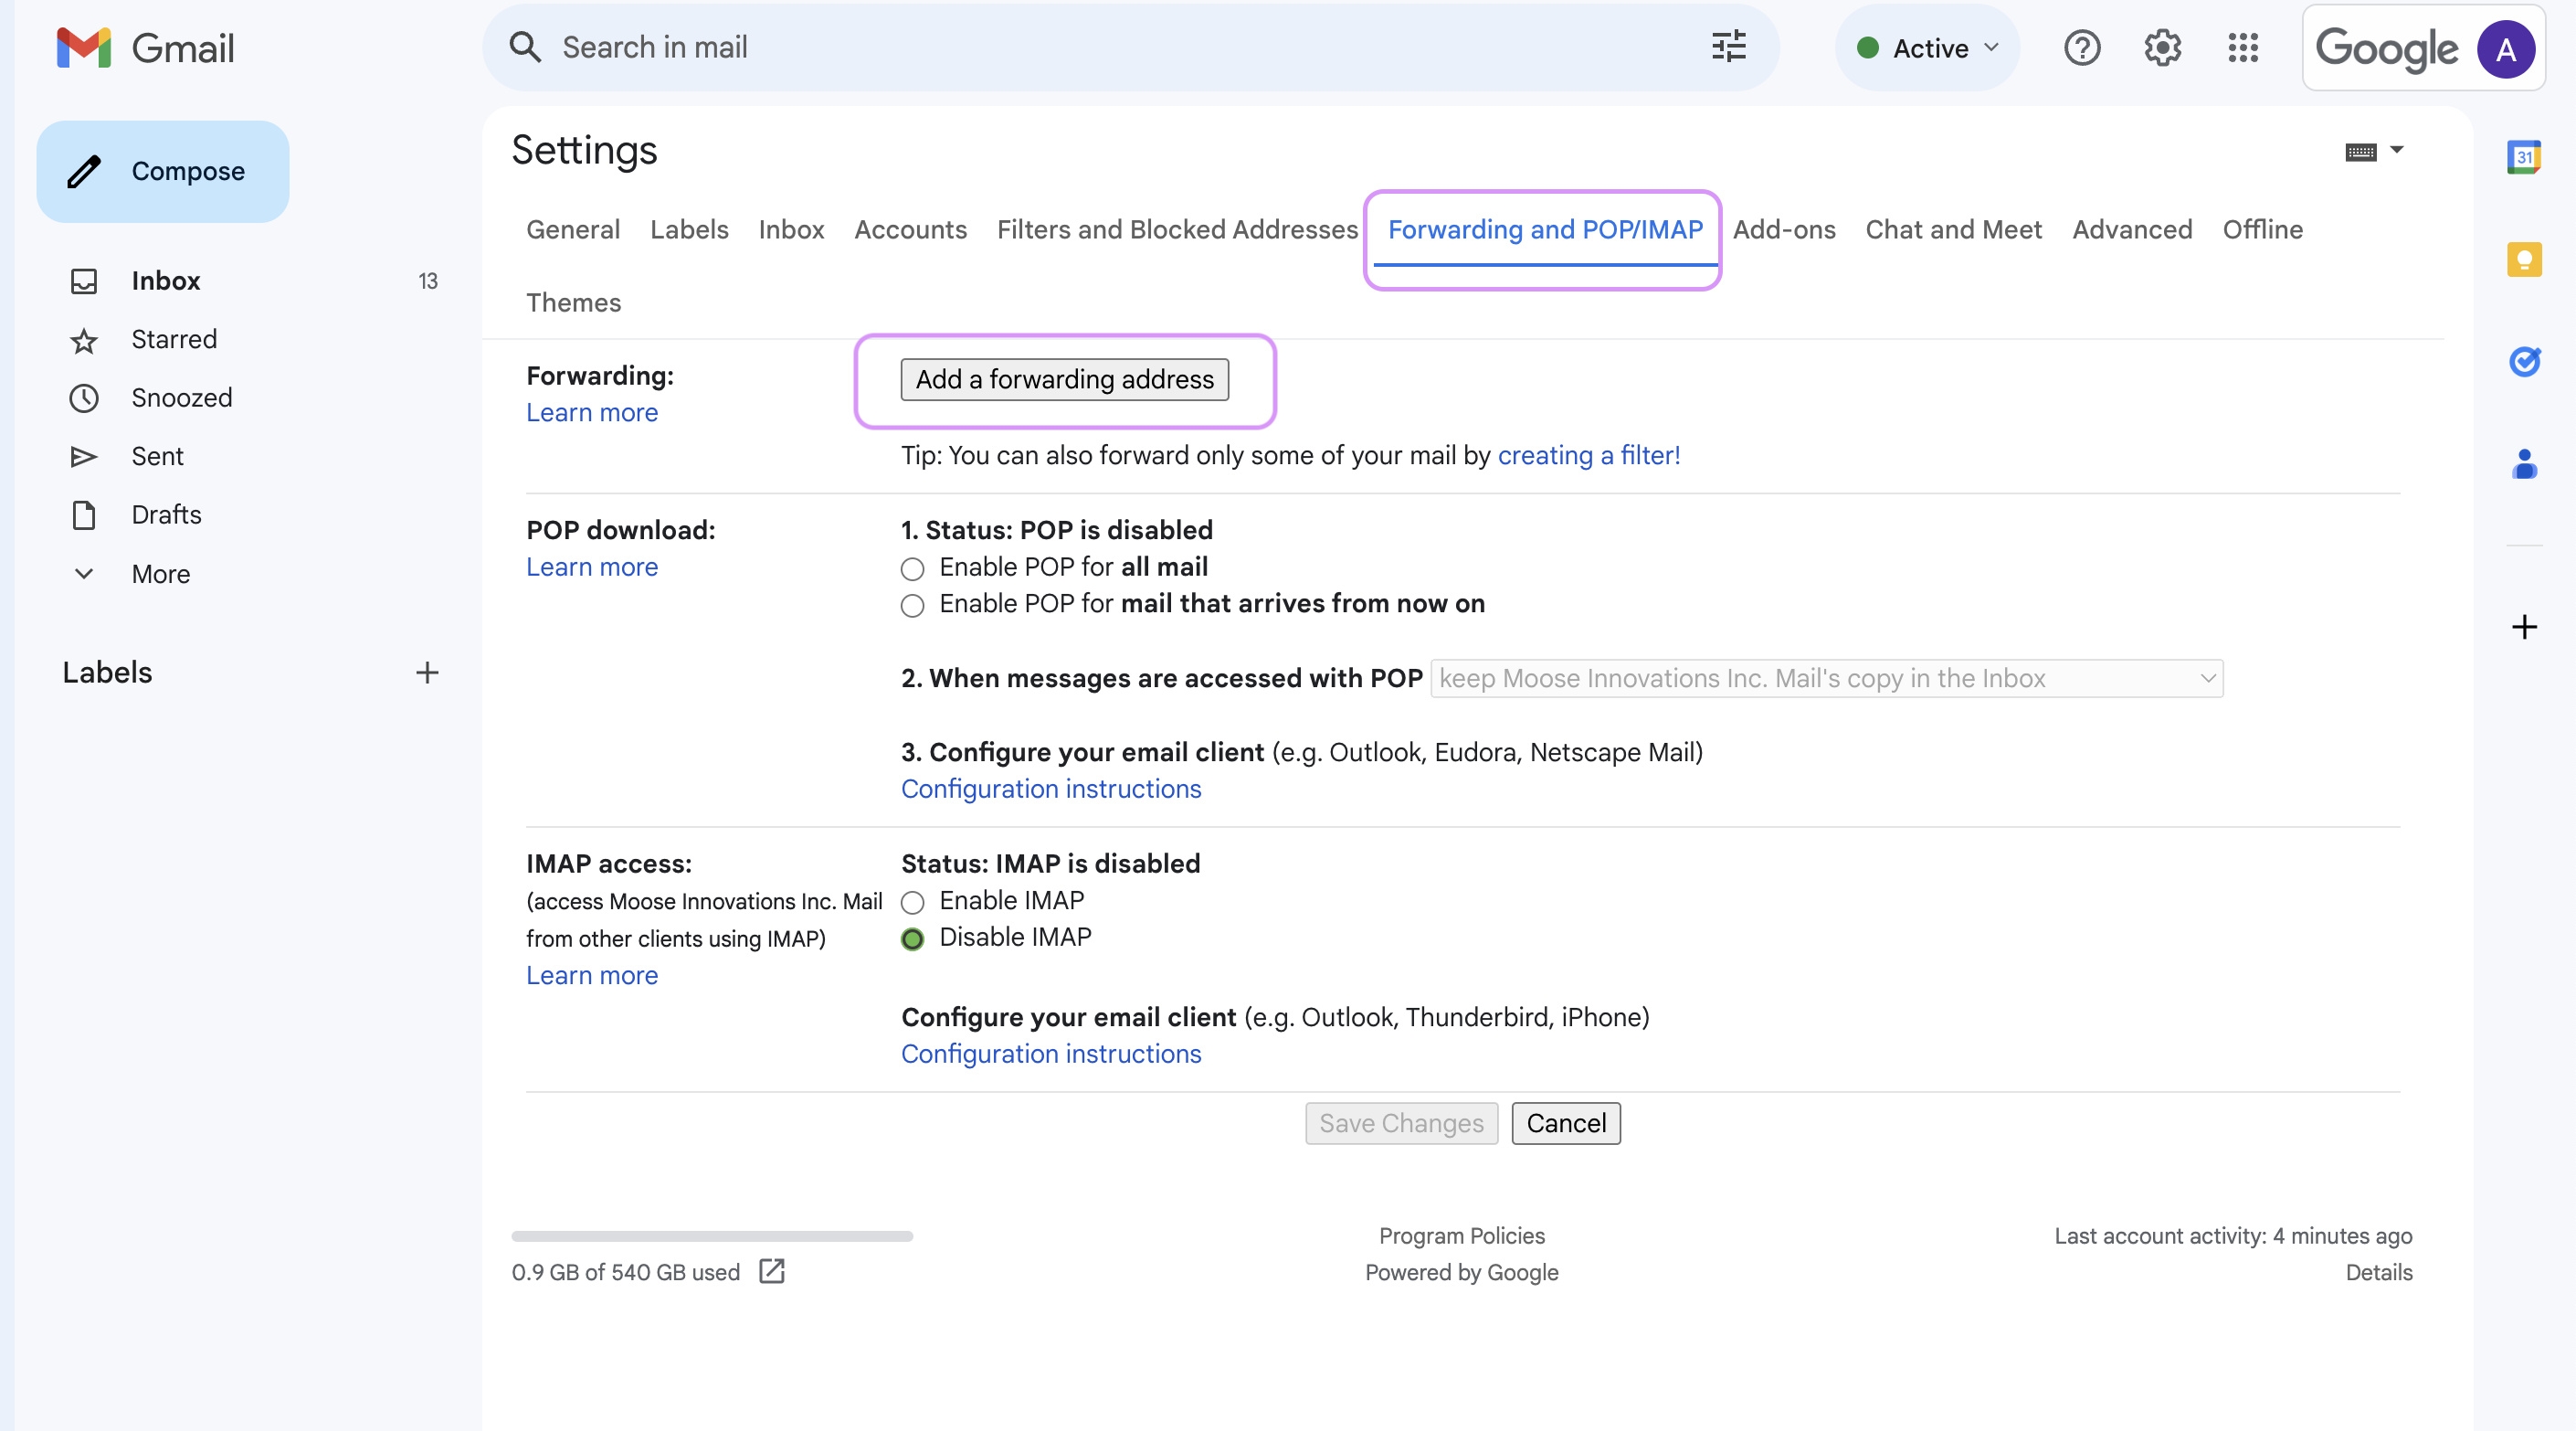
Step 4: Click the “Forwarding and POP/IMAP” tab
Step 5: Click “Add a forwarding address” and type in the default MooseDesk email address
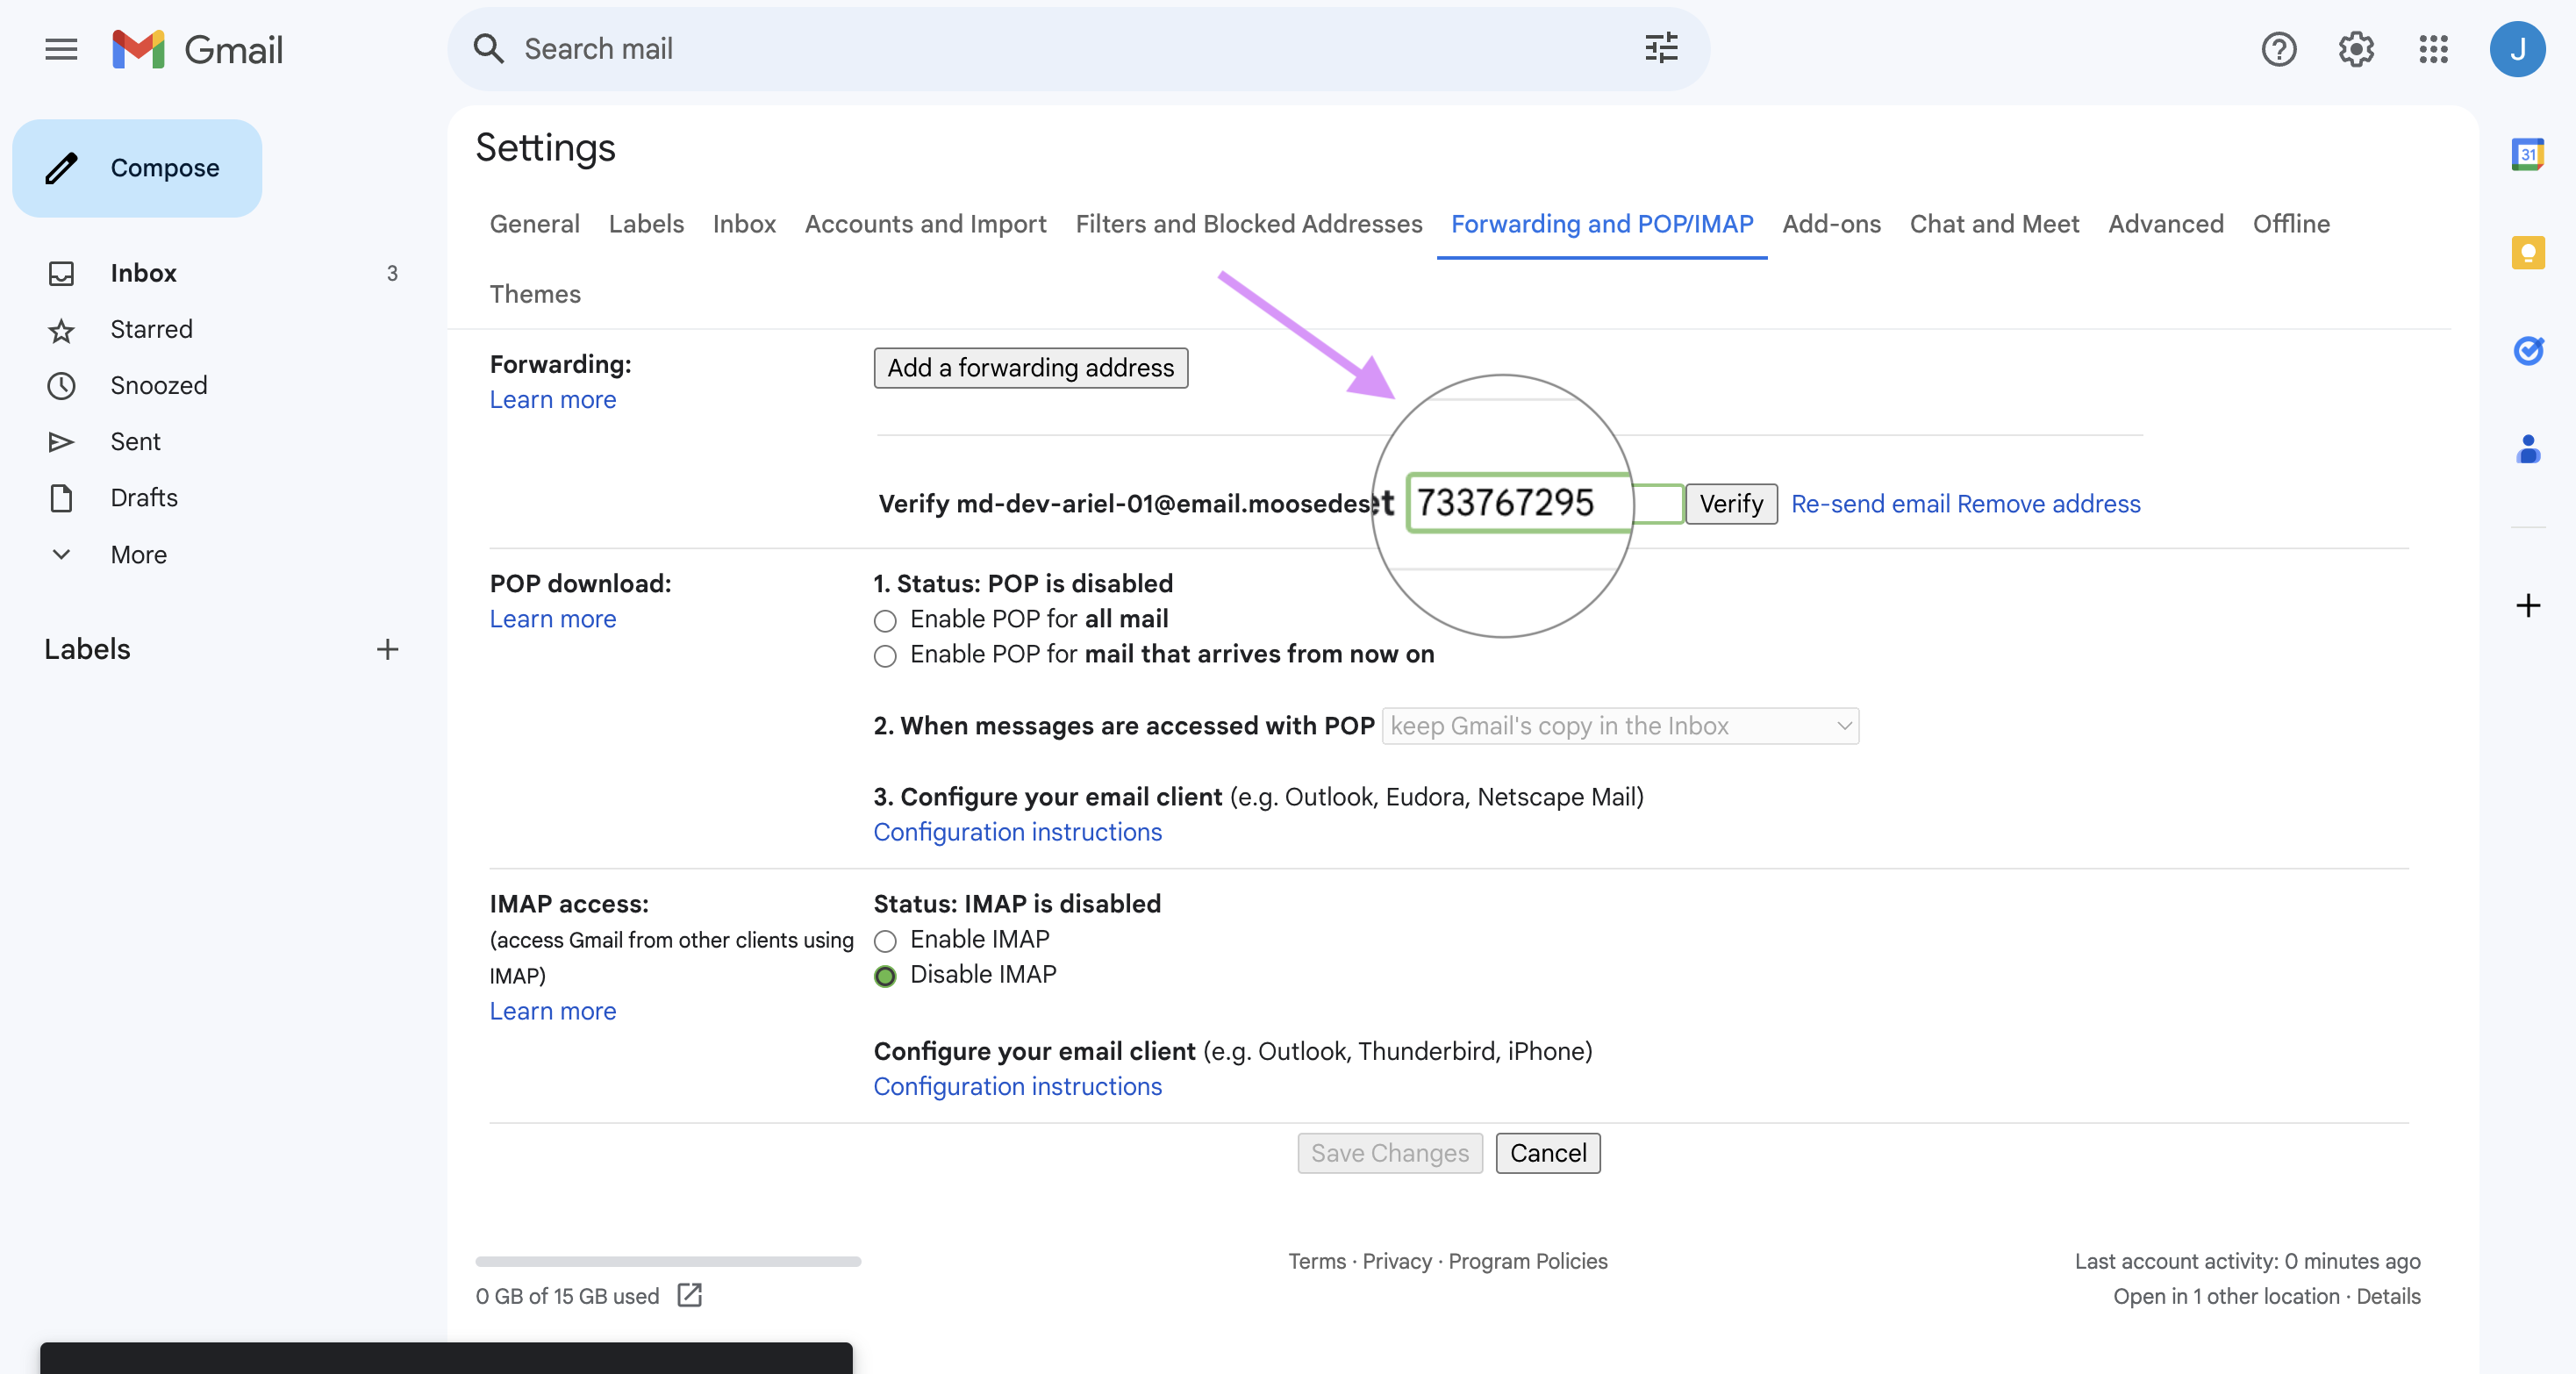
Step 6: Enter the confirmation code from Gmail settings and click “Verify“
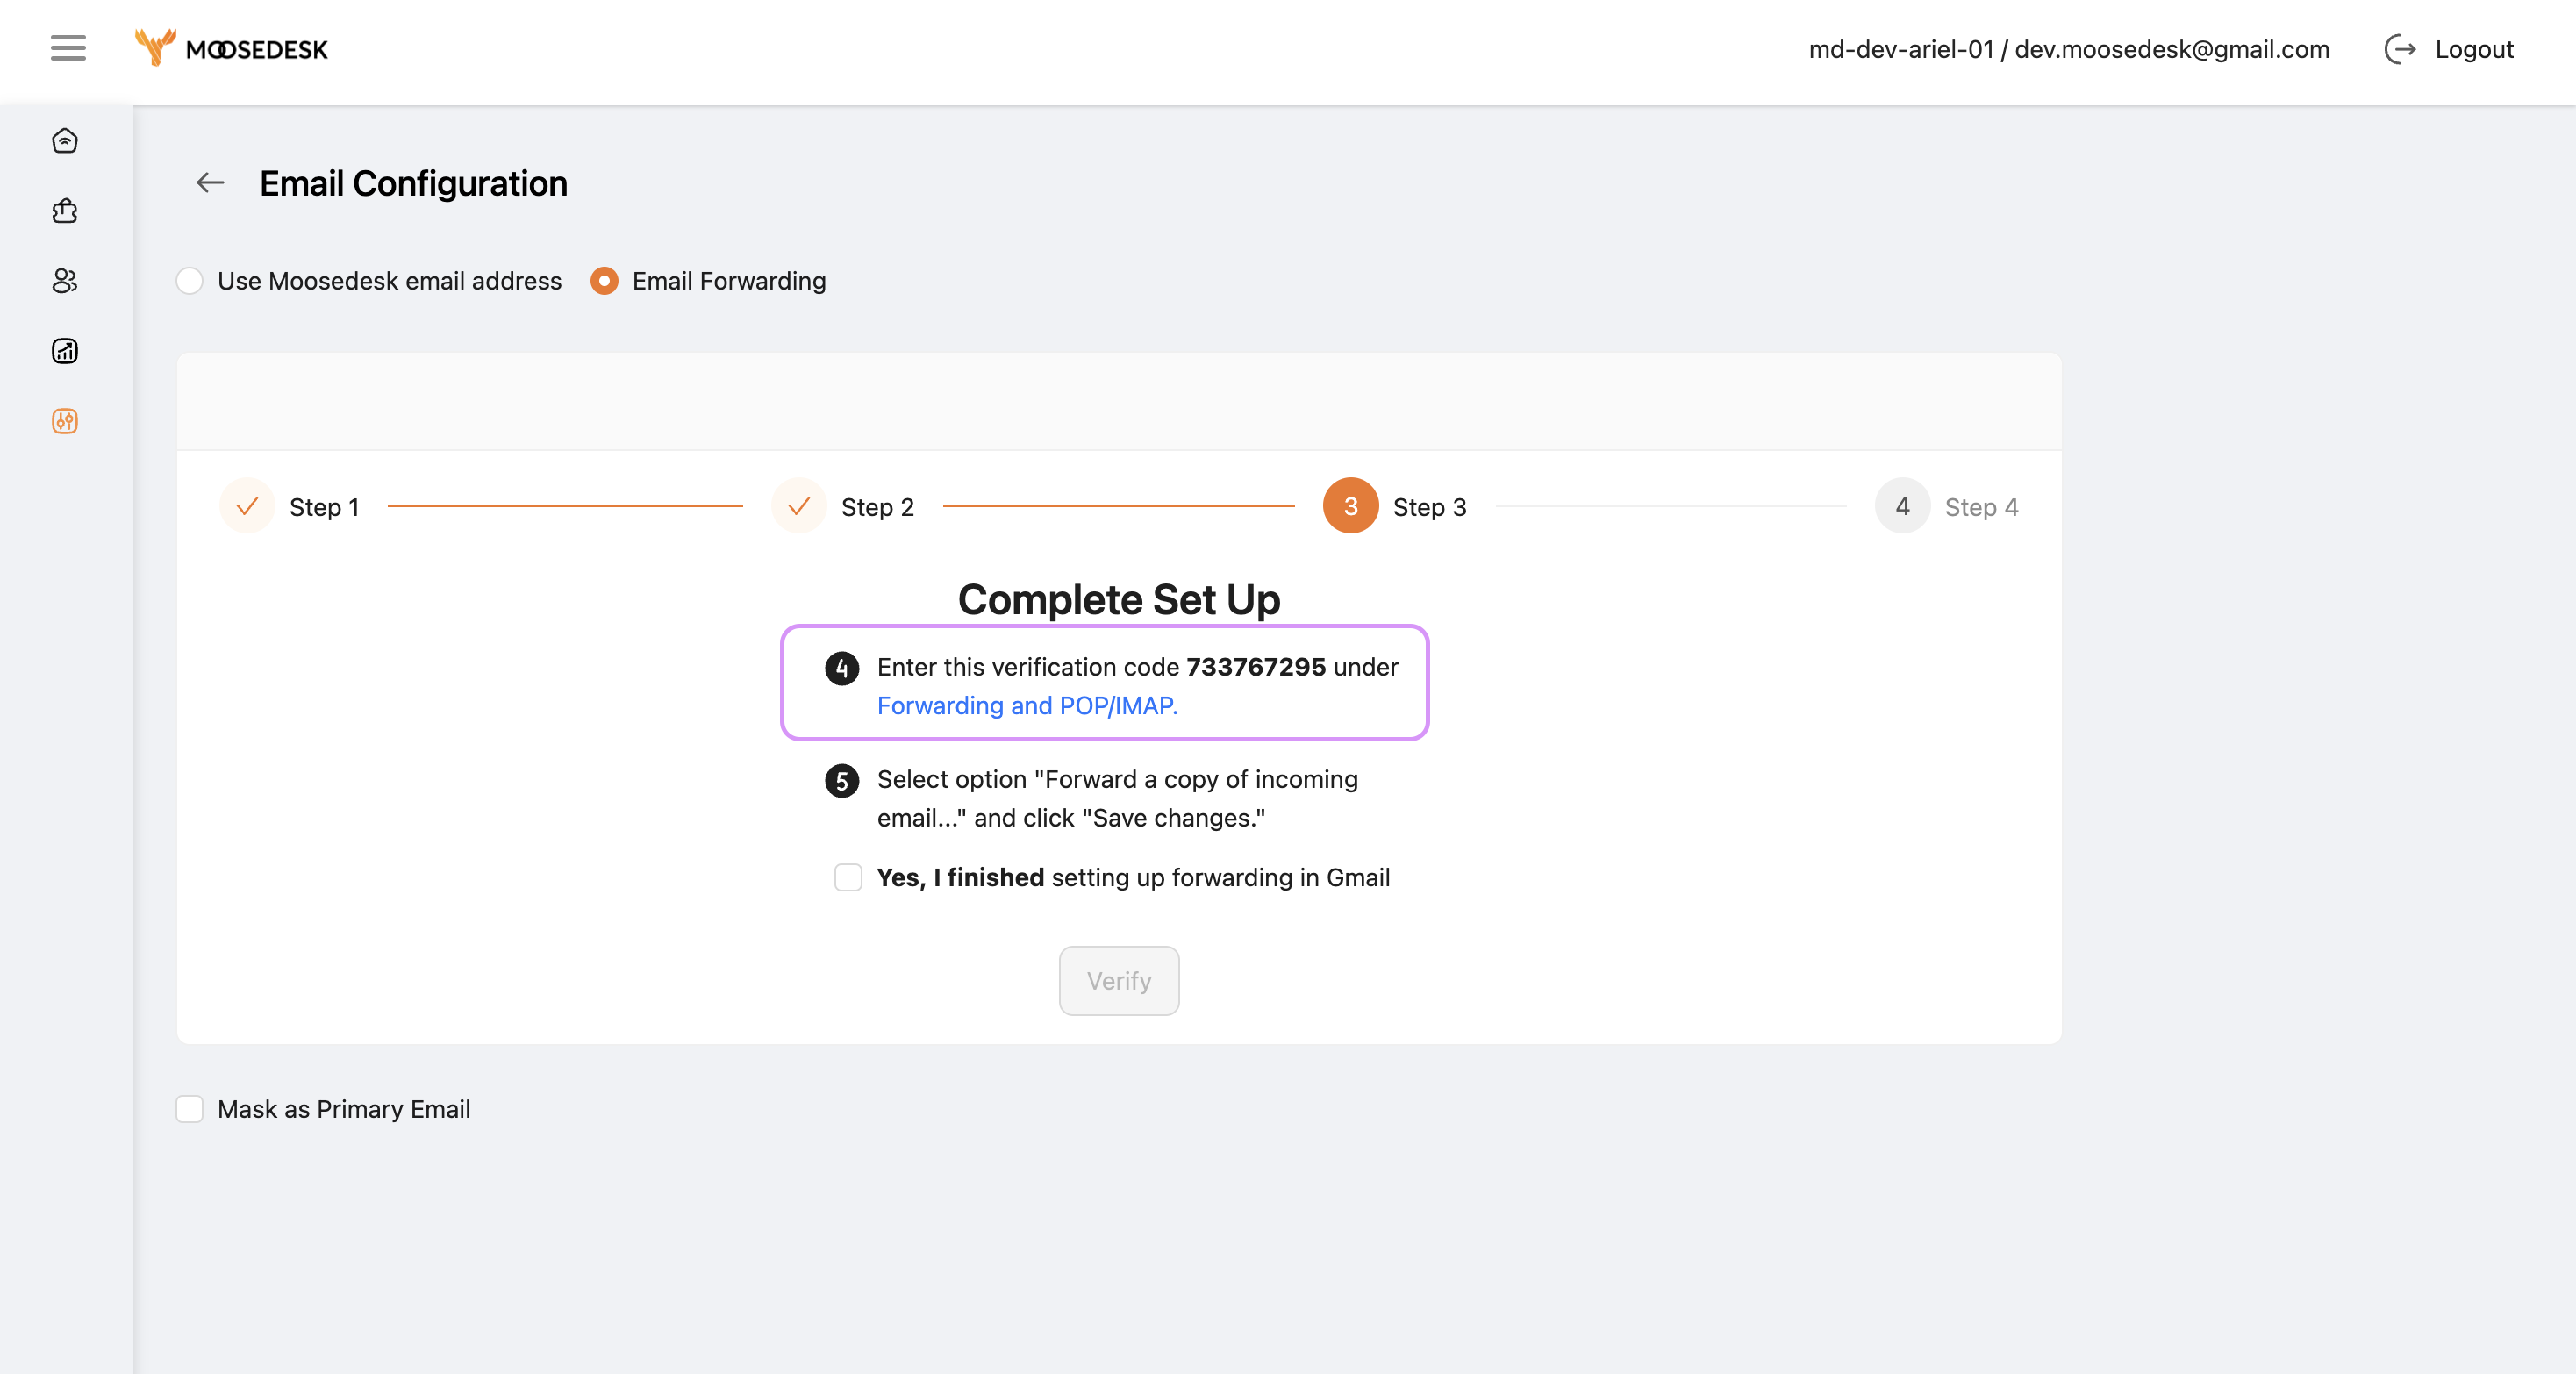
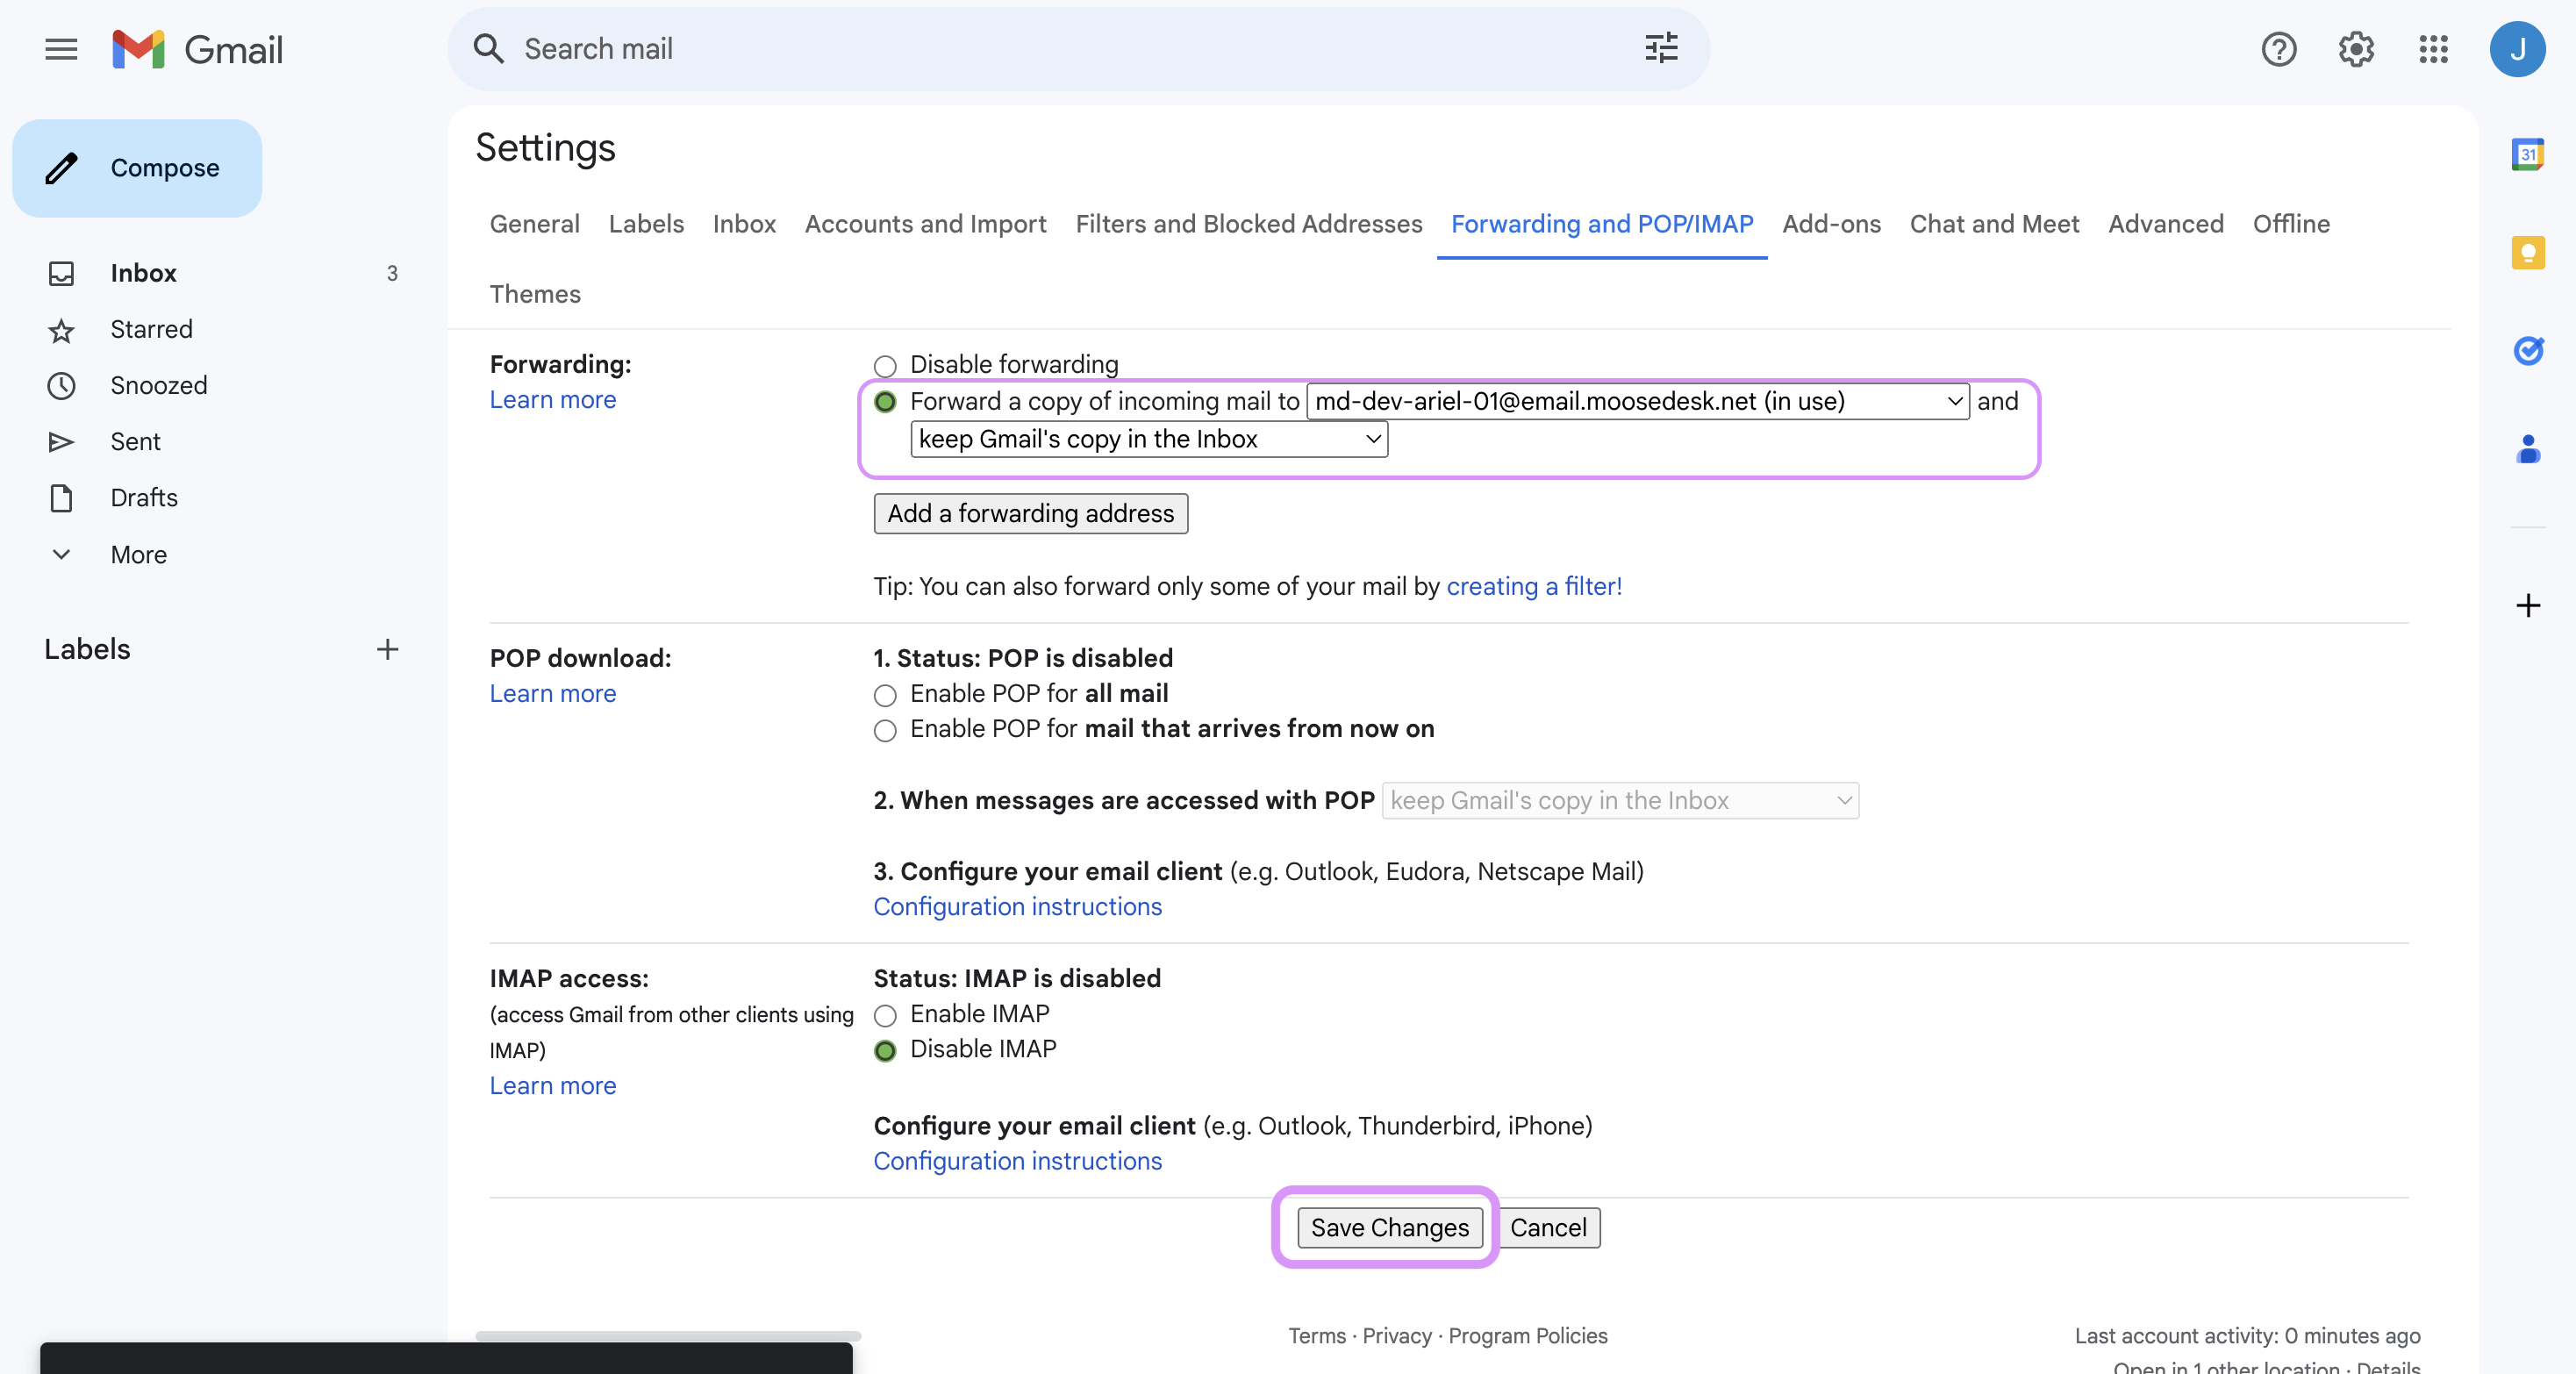
Step 7: Check this box in your Gmail settings and click “Save Changes“
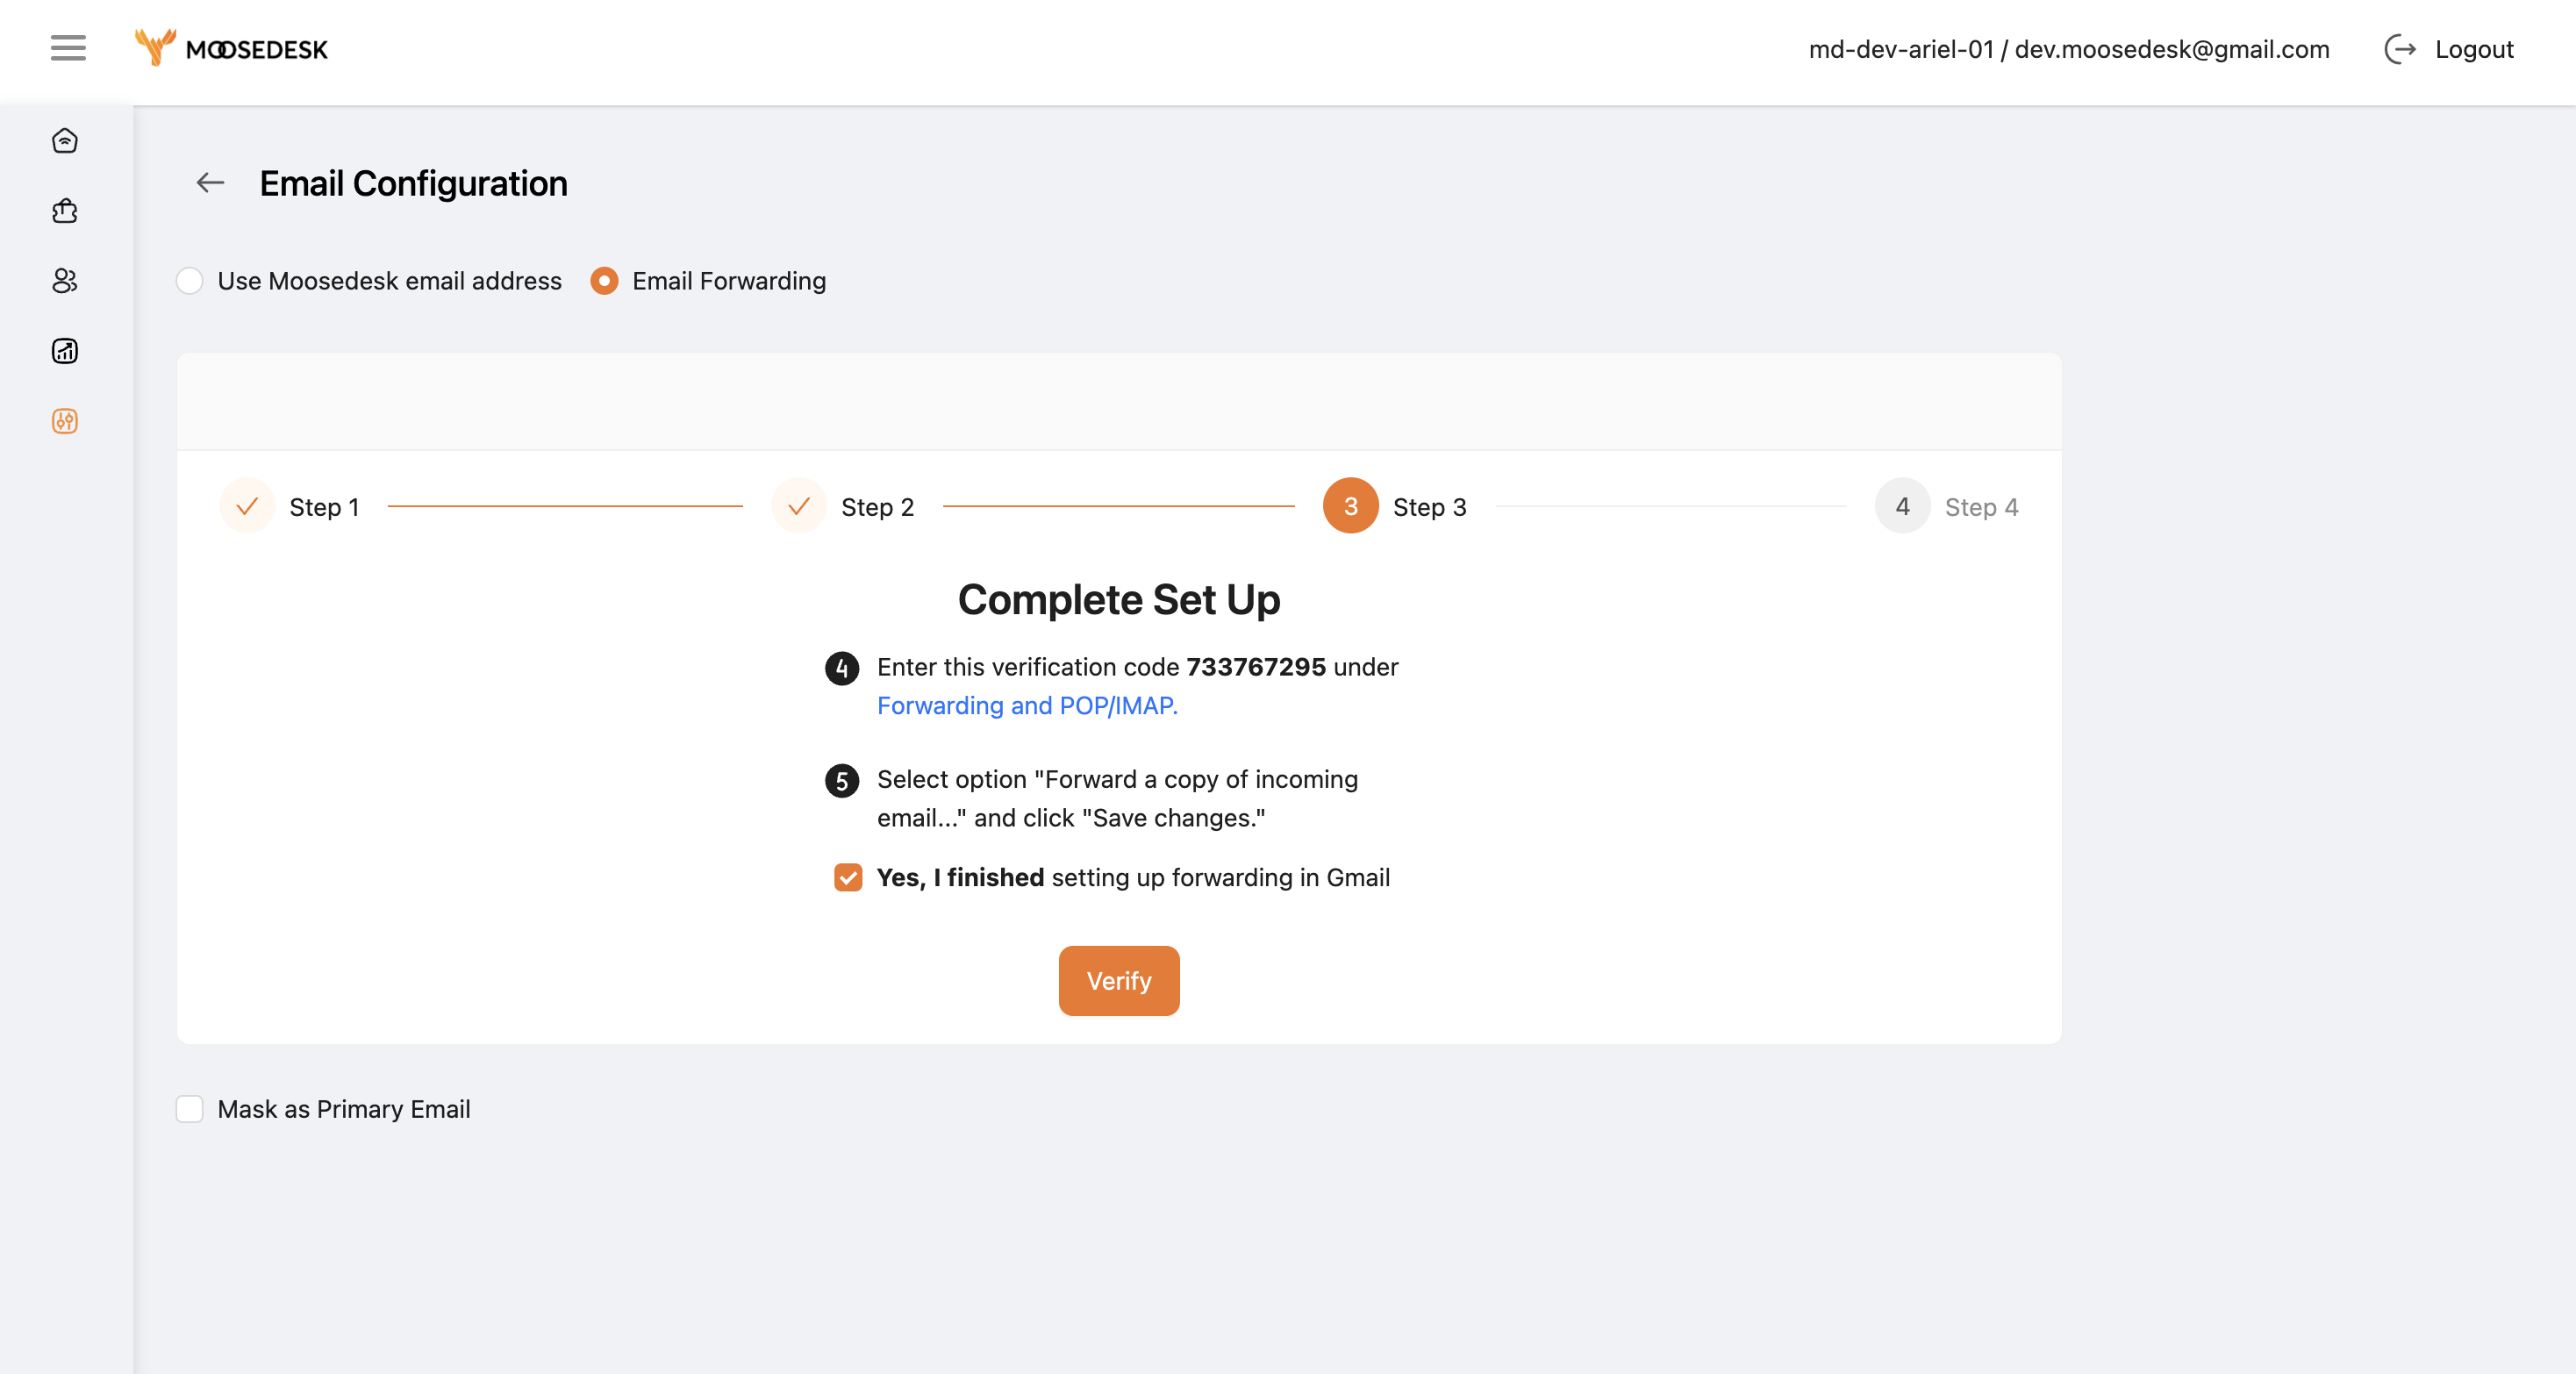
Step 8: Tick the box “Yes, I finished” and then click “Verify” on MooseDesk
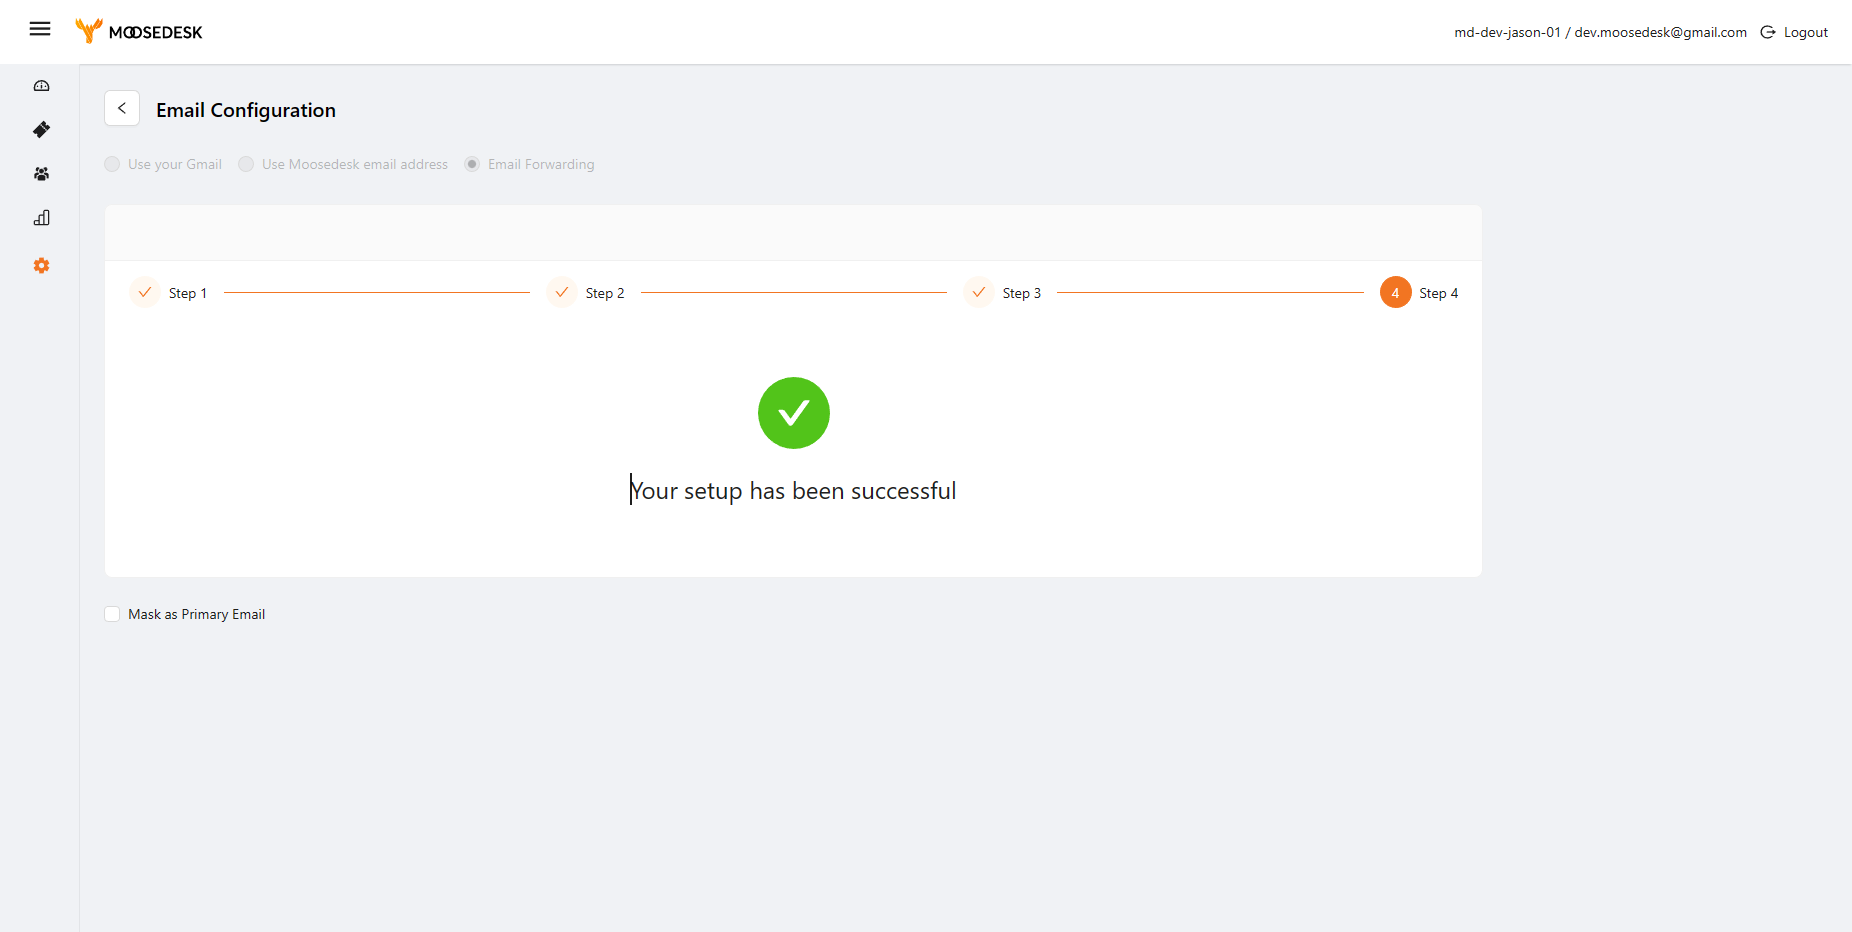
Step 9: There will be a confirmation email sent to your Gmail inbox, click the link to verify and you are all set!
Support Channels #
If you ever need assistance, our Help Center is packed with comprehensive guides and tutorials.
At MooseDesk, we’re always here to help. Our dedicated email and live chat teams are available around the clock. Drop us an email at help@moosedesk.com, or click the Live Chat icon located at the bottom left corner of the MooseDesk Dashboard, our official website, and even within this Help Center.