The “Customers” tab is where you manage and access your Customers’ contact details including names, email addresses, phone numbers, and all other information that would enable your support team to provide services effectively.
Customer Profiles #
To access the Customer profiles, please follow these steps:
Step 1: Navigate to the “Customers” tab
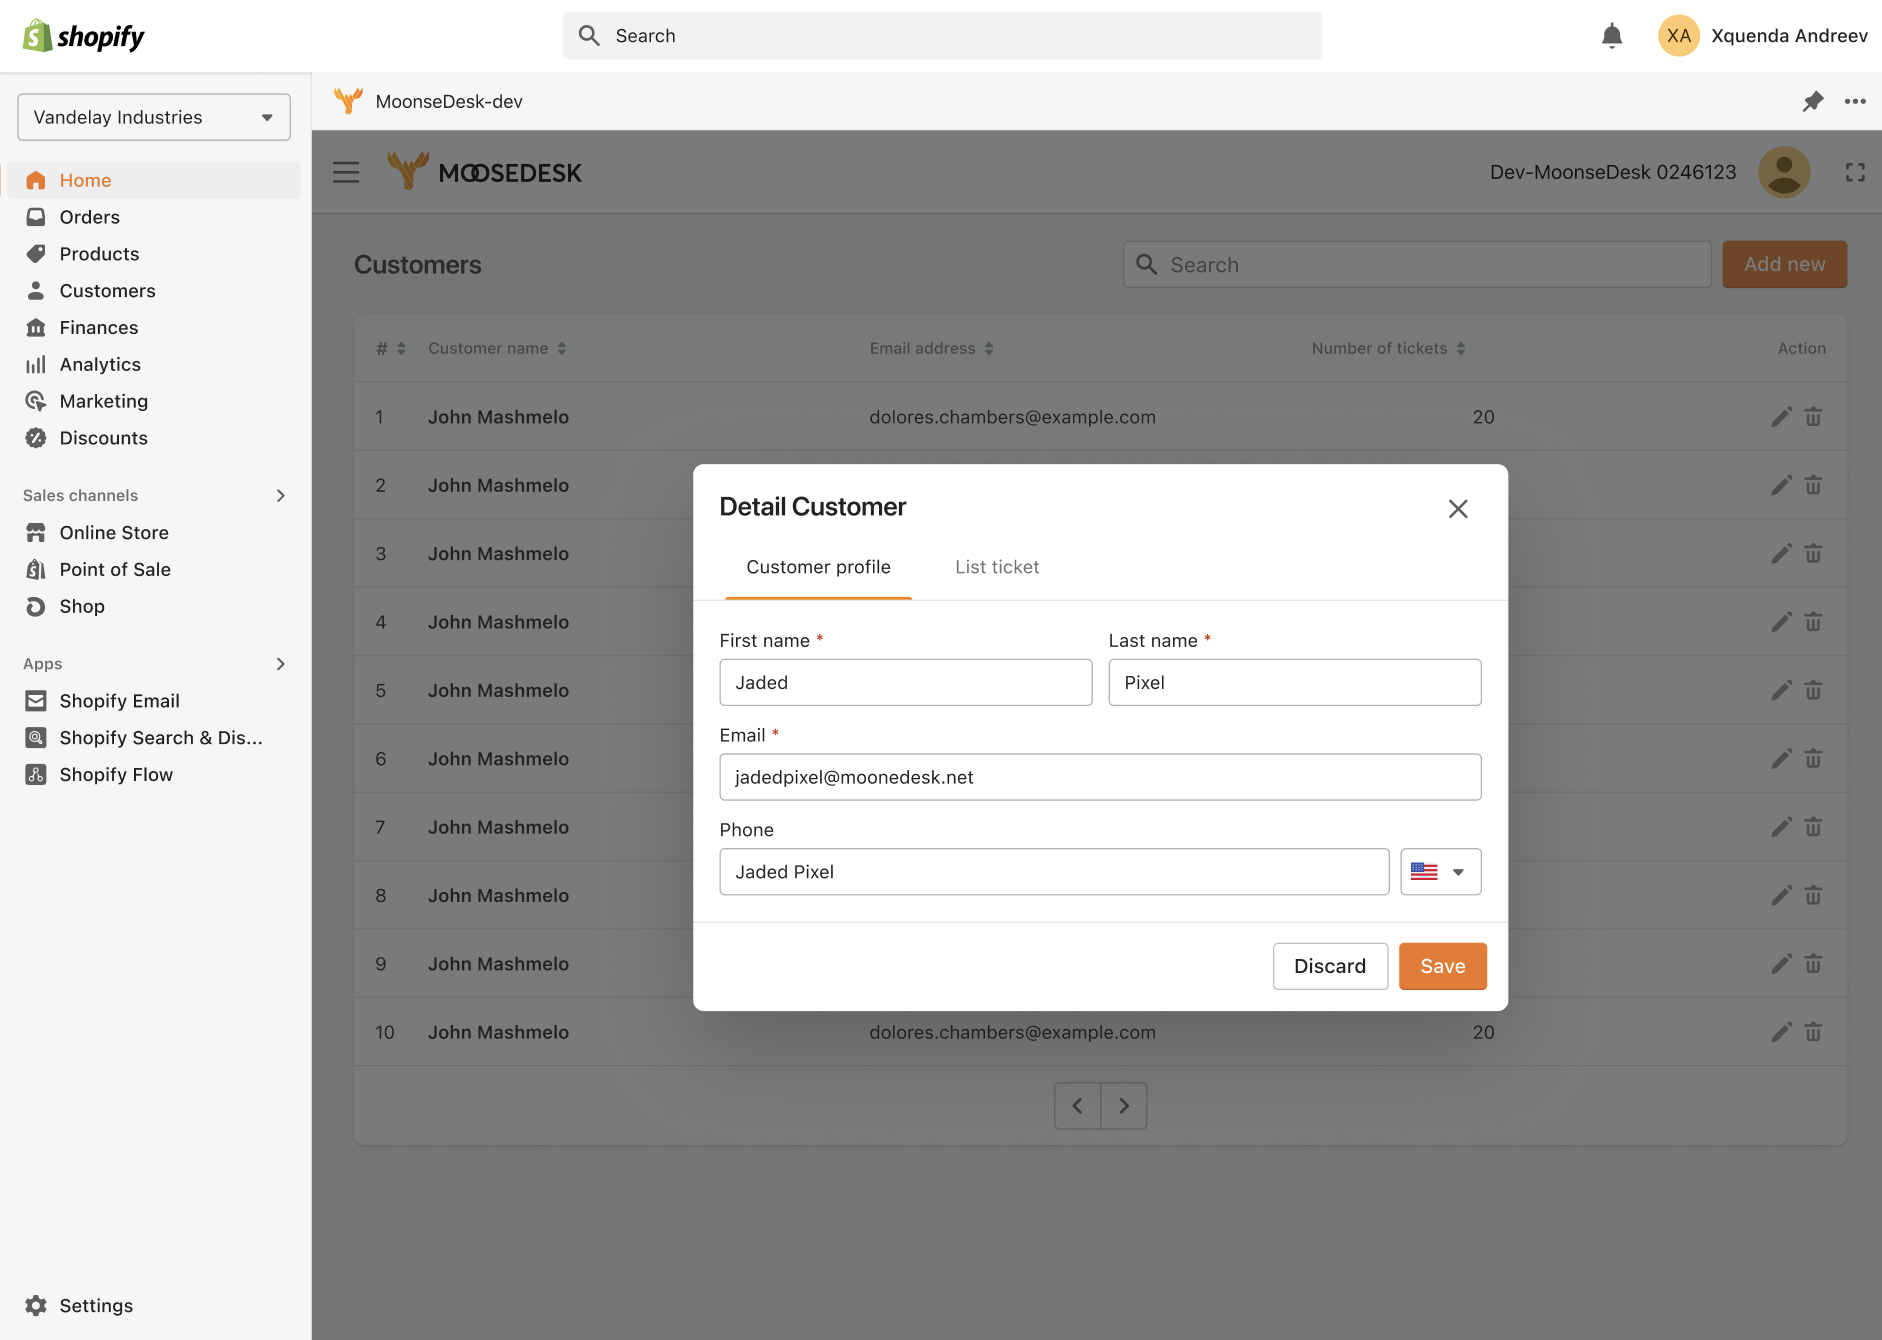
Step 2: Click on any Customer you want to view. The Customer Profile will pop up as a lightbox and consists of two main parts: “Customer profile” and “Ticket list“.
The “Customer profile” tab includes:
- Name
- Phone number
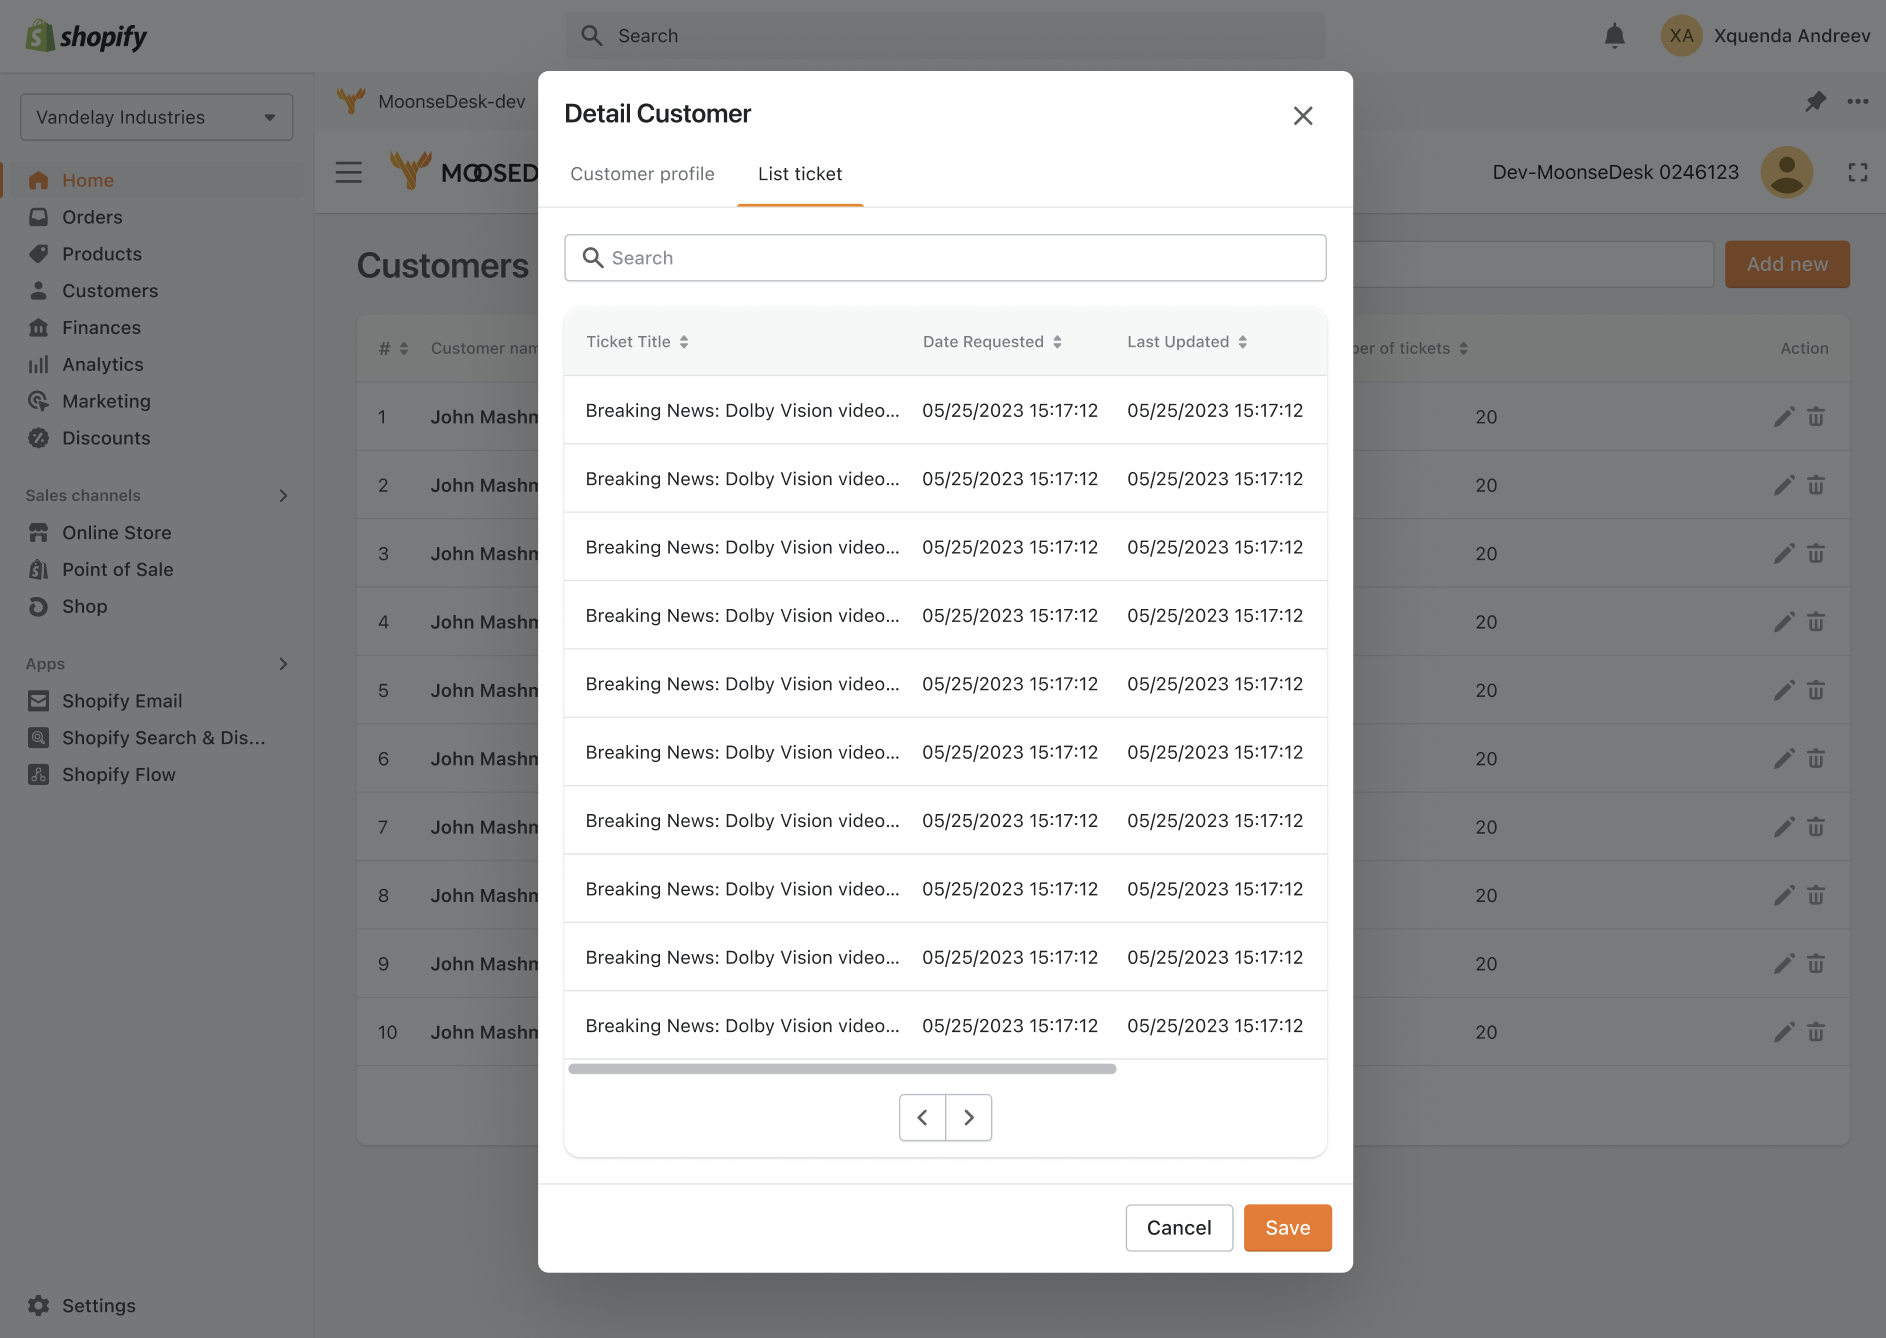
The “List ticket” tab includes:
- Ticket title
- Date requested
- Last updated
- Status
- Priority
- Assigned agent for each ticket
The Customer profiles can be created automatically and manually. Here is how it works:
| Automatically | Customers who contacted your support team via any means for the first time will have a profile automatically created |
| Manually | Agents can create a profile manually by clicking on the “Add customer” button. You can also have options to import Customer’s information by uploading a CSV file or sync with Shopify data automatically. |
For more details on how to create a new Customer profile, you can refer to this article.
Customer Search #
To search for a Customer in MooseDesk, you can follow these steps:
Step 1: Locate the Customer search bar or icon
Step 2: Enter the relevant Customer information to find the specific customer you are looking for. You can search using various parameters, such as Customer name, email address, phone number, or any other identifying information associated with the Customer.
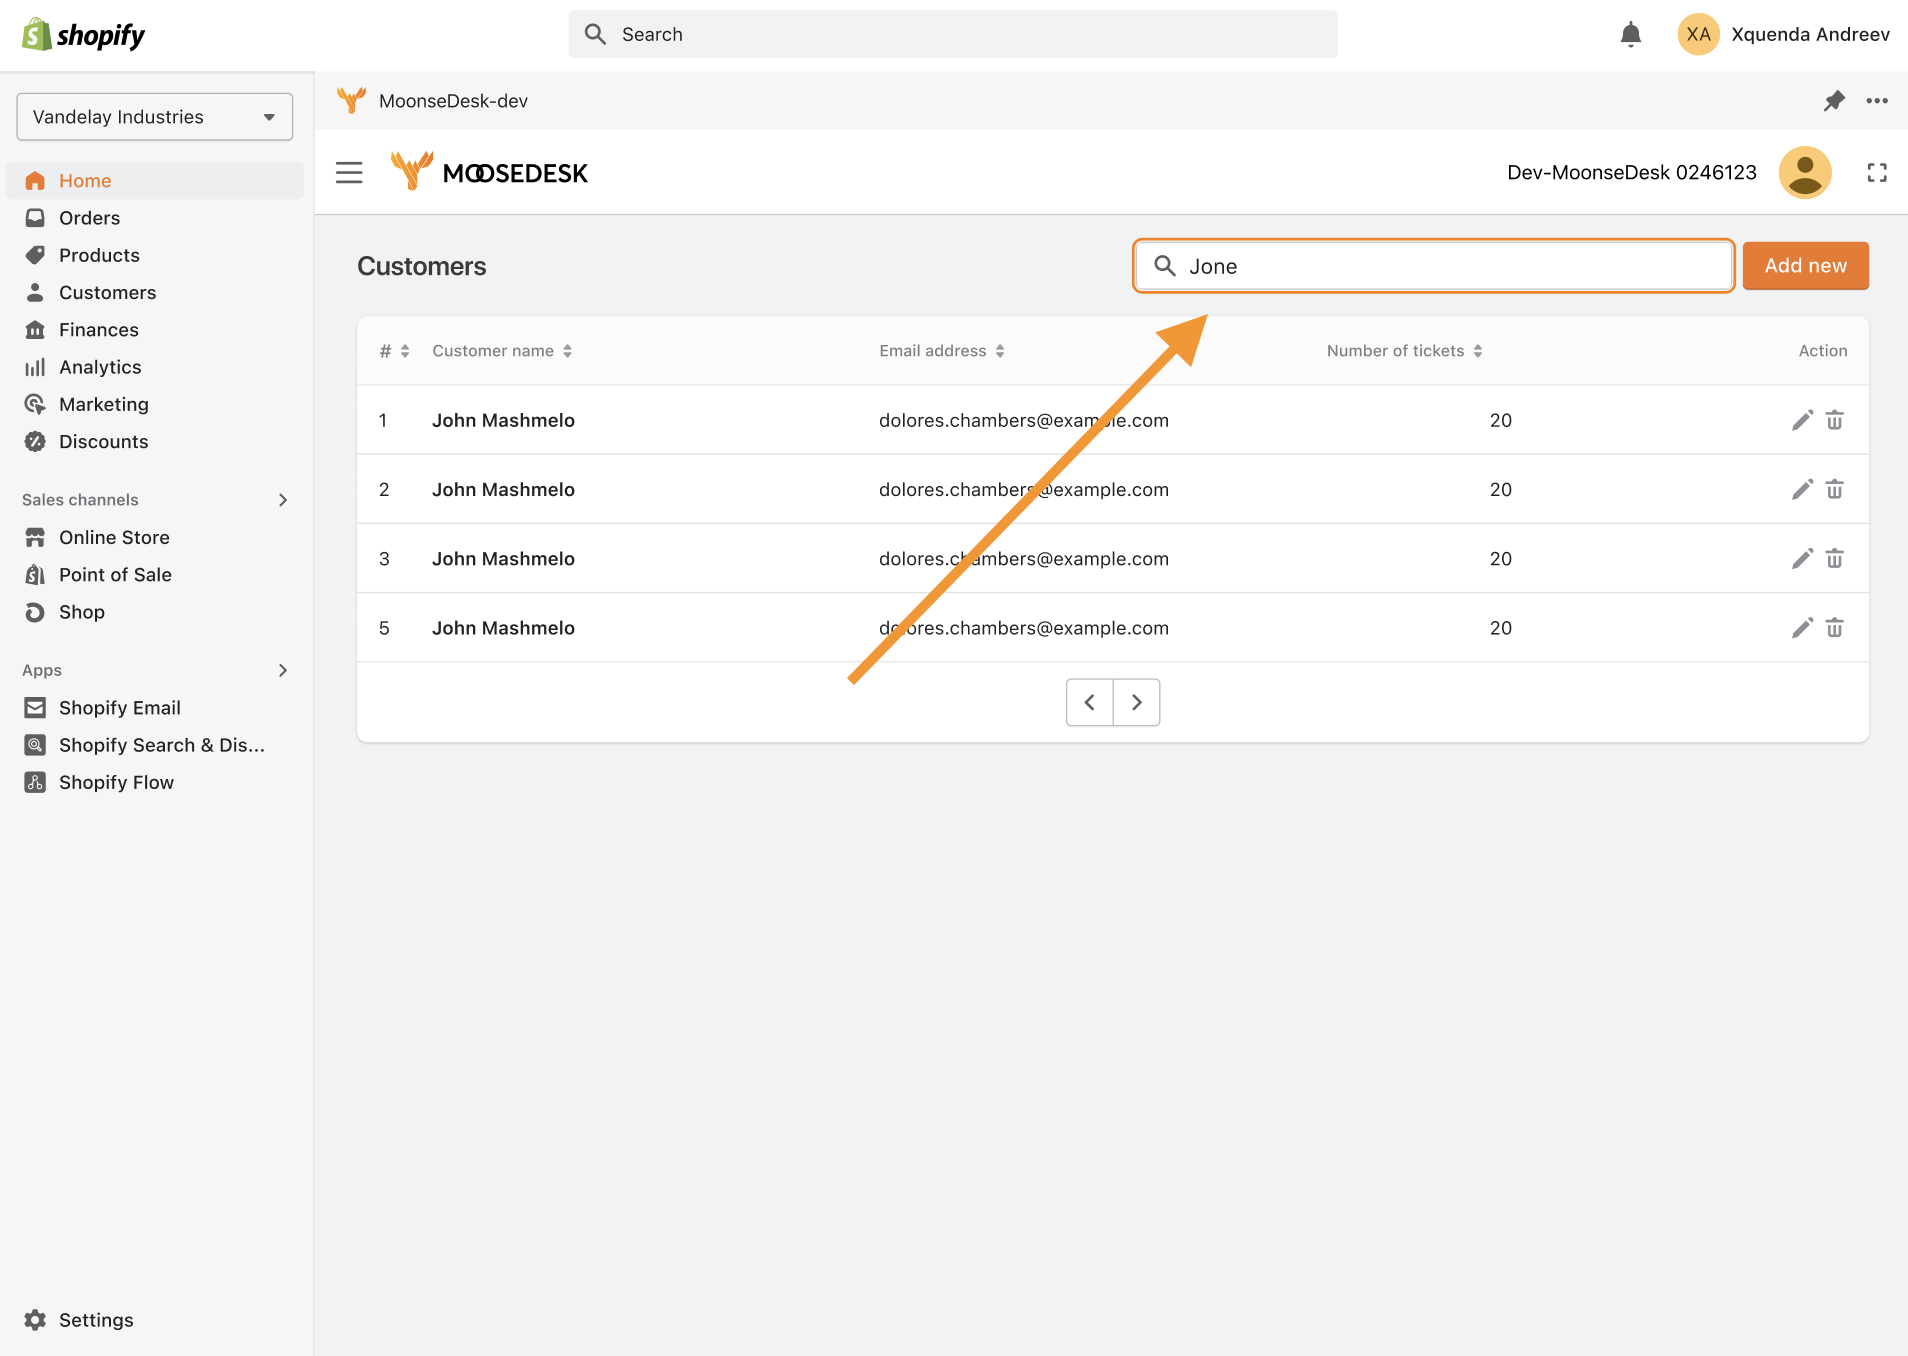
Step 3: Review Search Results: MooseDesk will display the search results based on your entered criteria. Scan through the search results to locate the desired Customer. The results typically include key information about each Customer, such as names, email addresses, phone numbers, and any associated tickets or activities.
Step 4: Click on the Customer from the search results to access their profile, where you can review their contact information, order history, tickets, and any other relevant details.
In this section #
Support Channels #
If you ever need assistance, our Help Center is packed with comprehensive guides and tutorials.
At MooseDesk, we’re always here to help. Our dedicated email and live chat teams are available around the clock. Drop us an email at help@moosedesk.com, or click the Live Chat icon located at the bottom left corner of the MooseDesk Dashboard, our official website, and even within this Help Center.