This article will walk you through the steps to add or deactivate a teammate in the MooseDesk workspace.
Adding a new teammate #
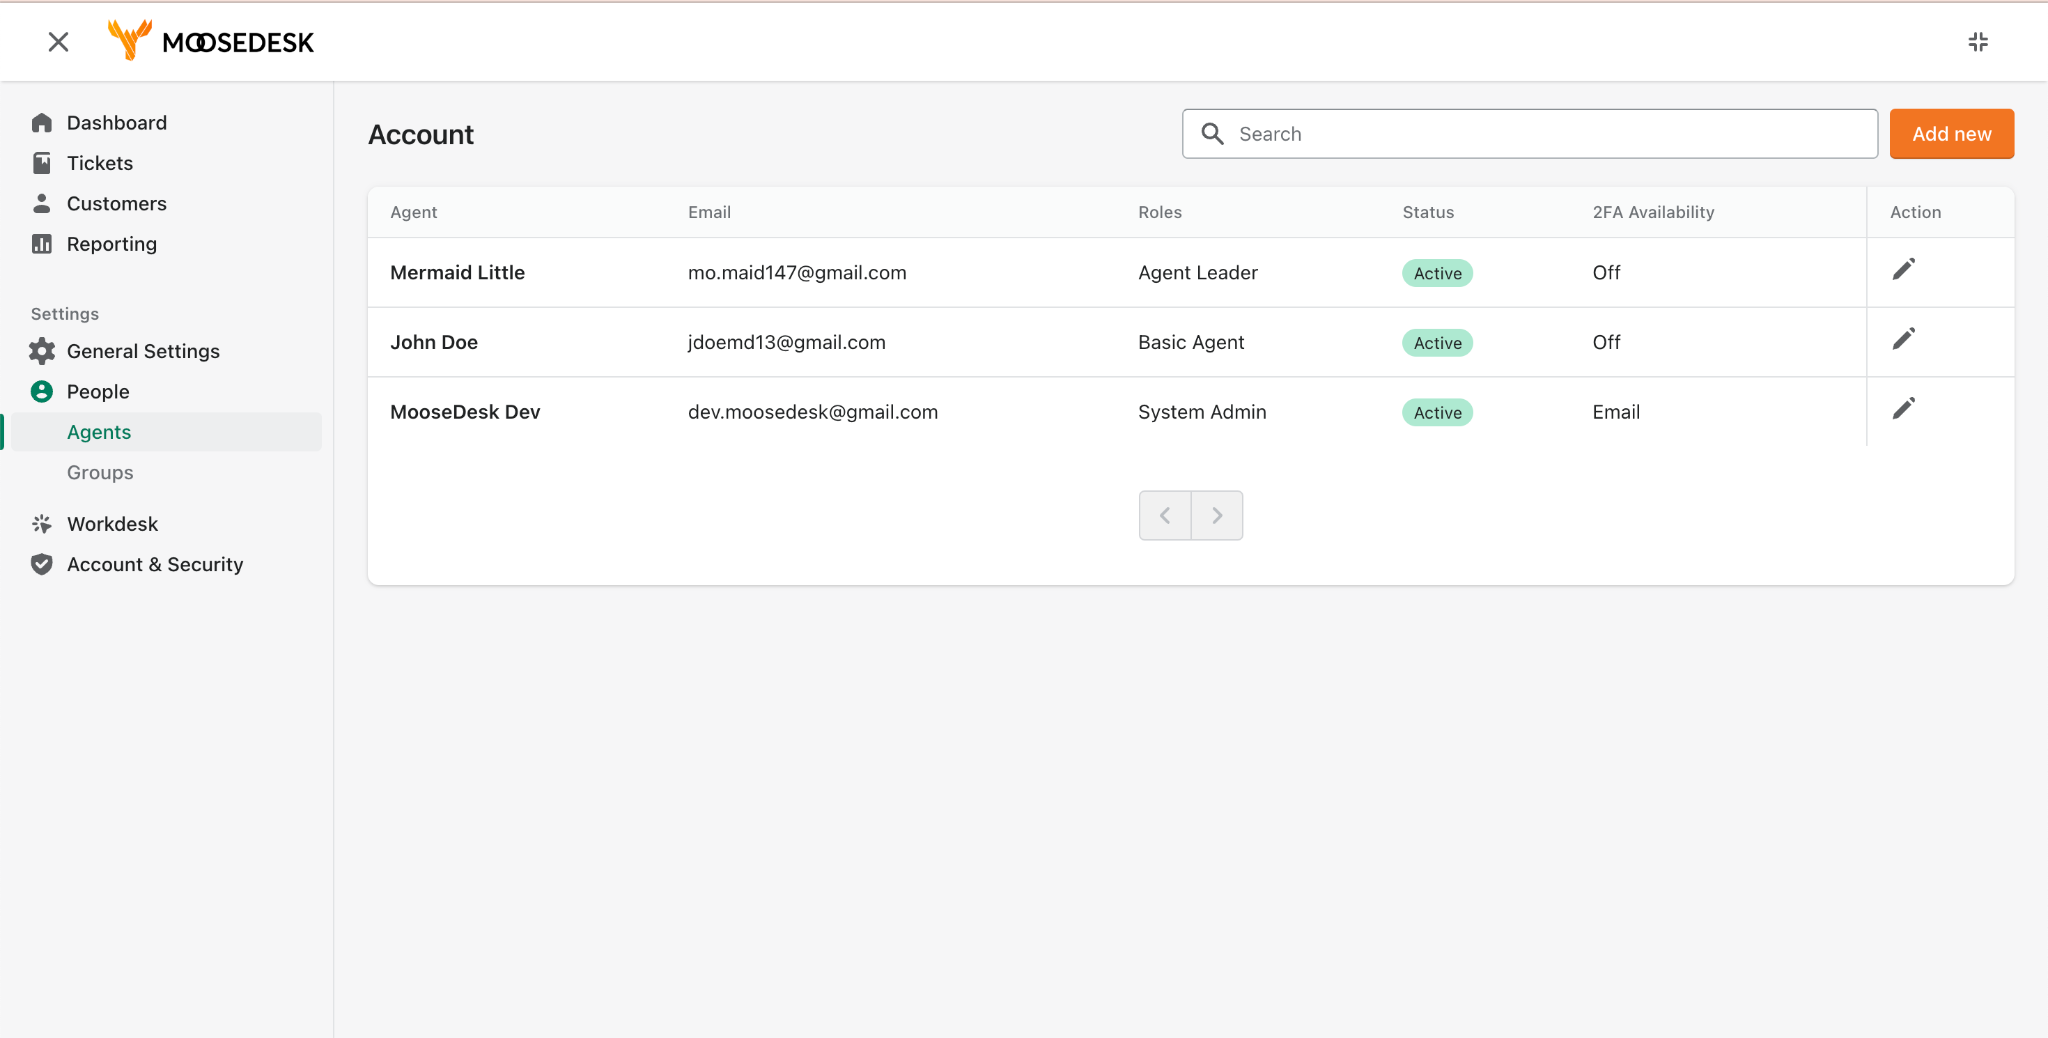
Step 1: Navigate to “Settings” > “People” > “Agents“
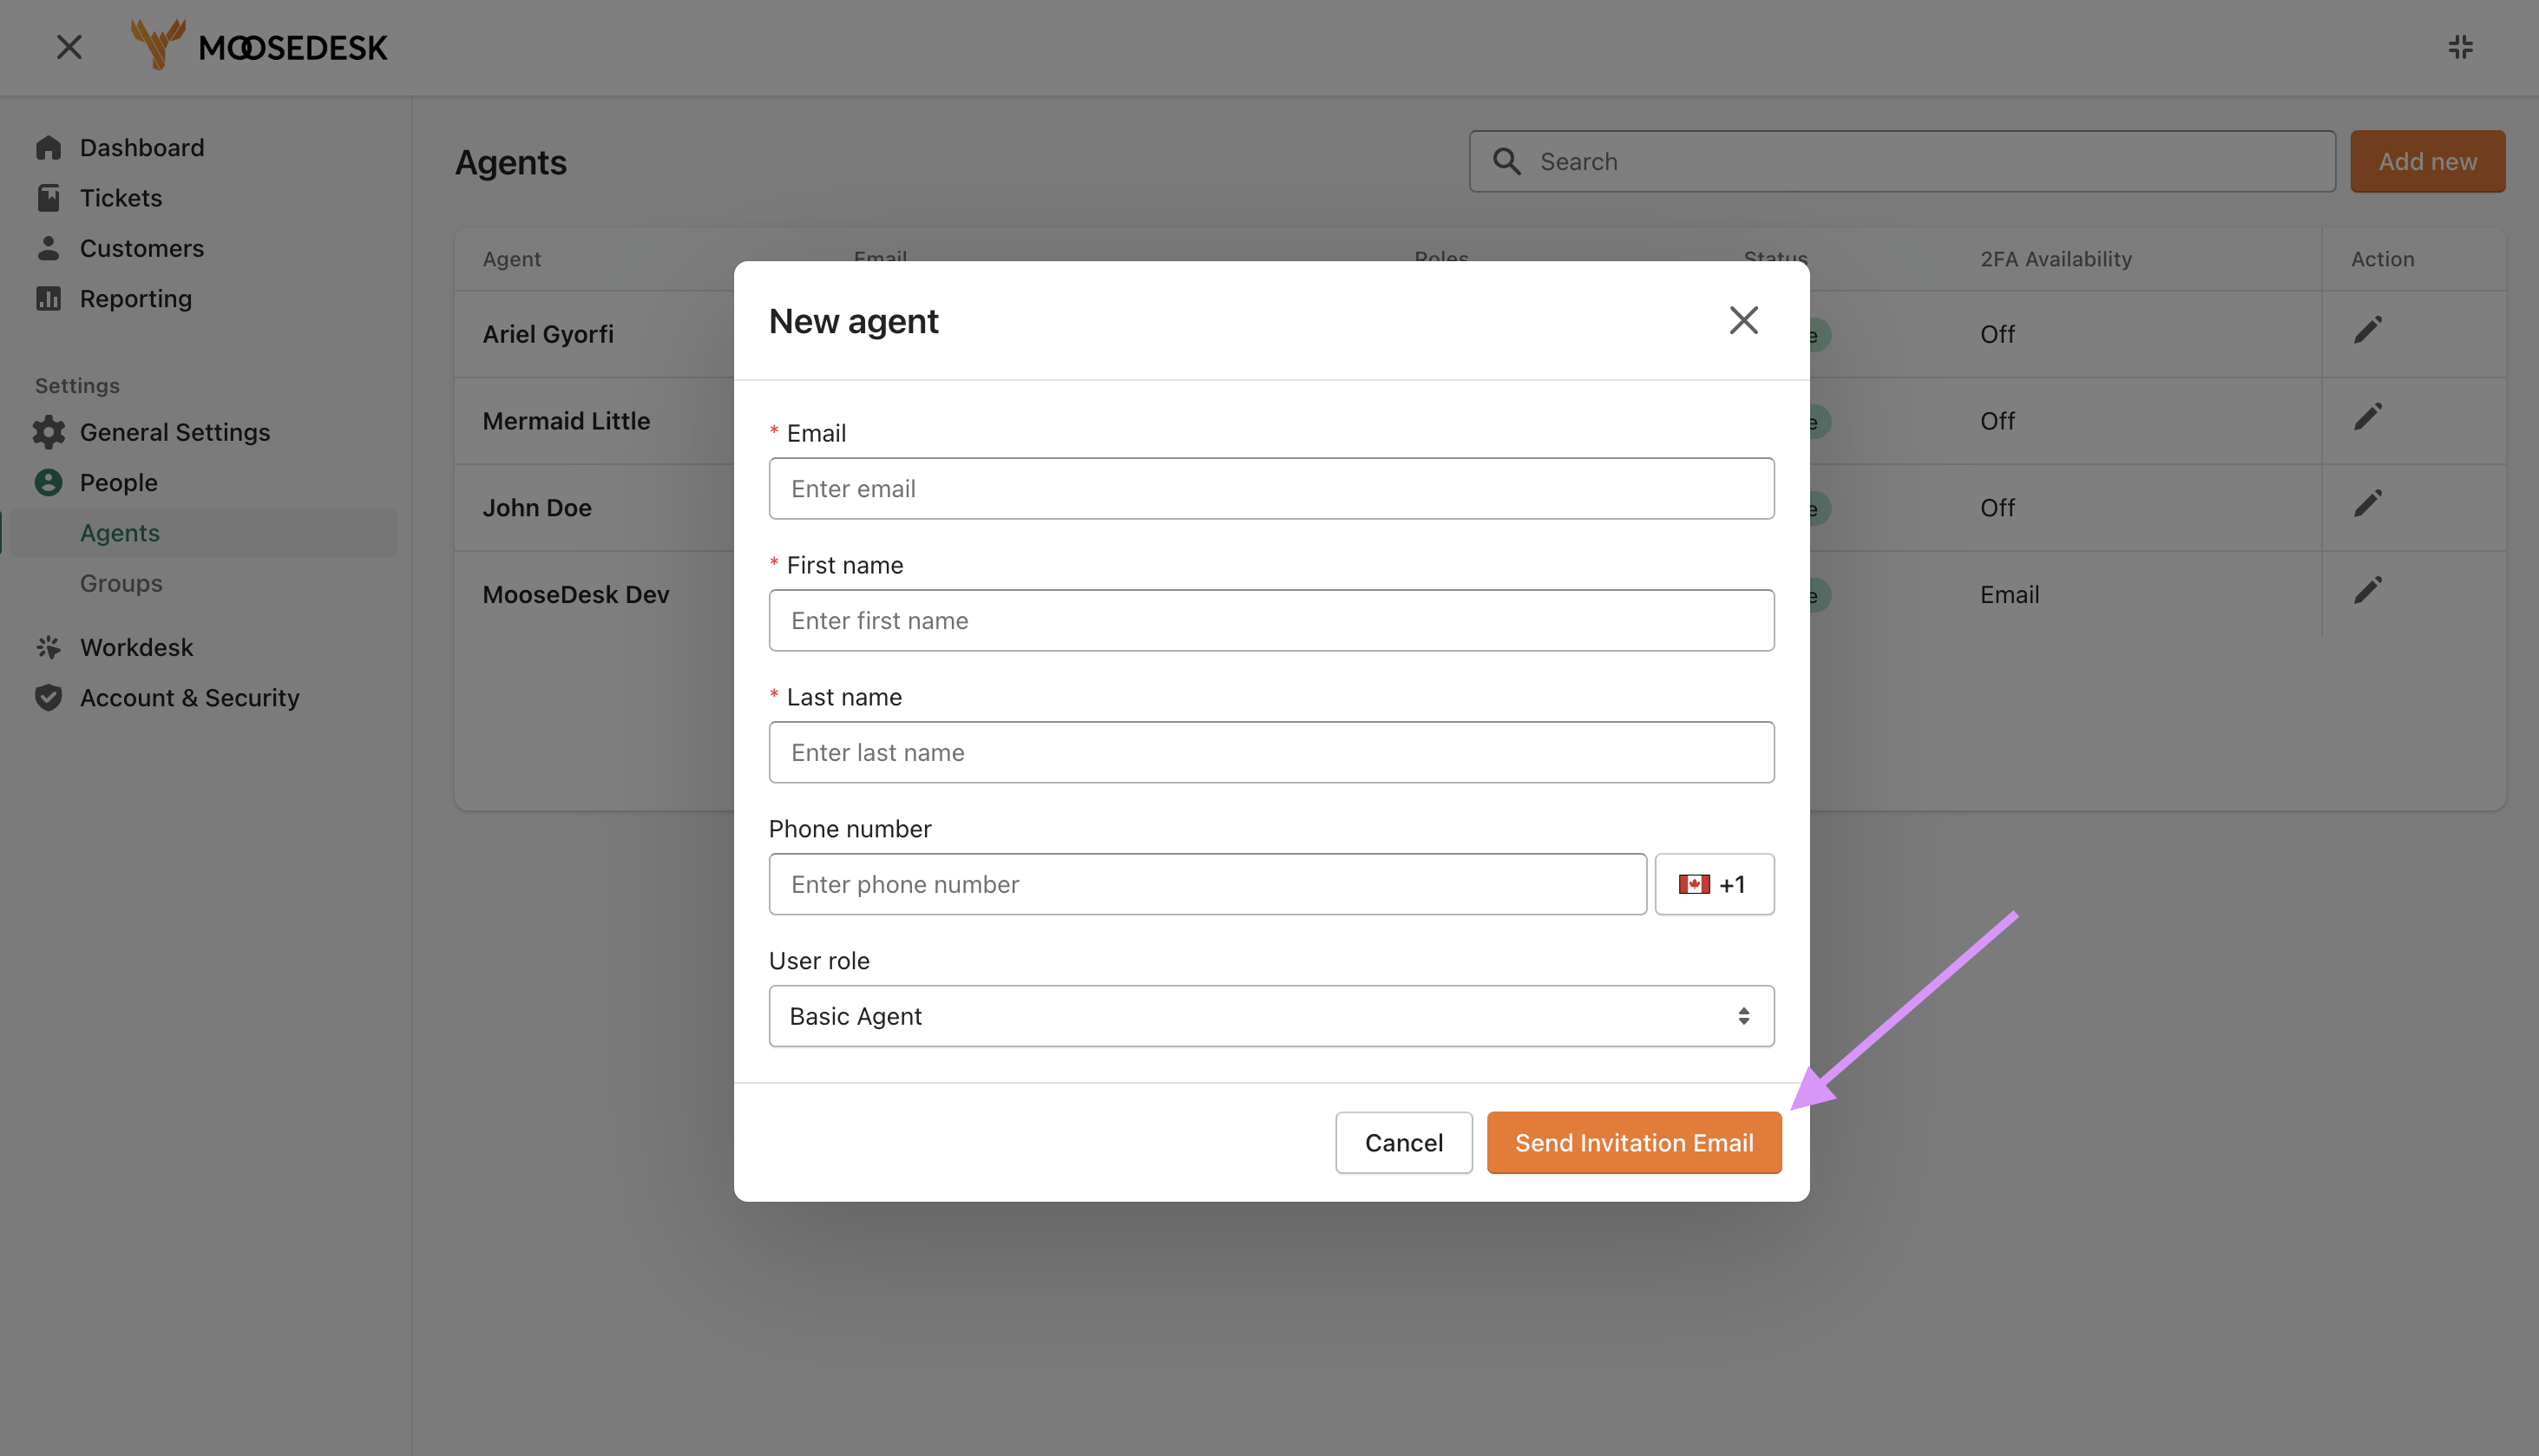
Step 2: Click “Add New” on the top right corner of the dashboard
Step 3: Enter the teammate’s information including email address, name, phone number, and set their role
Note: For more details about user roles and their corresponding permissions, you can refer to this article: How to set up roles and permissions for your team
Step 4: Click “Send Invitation Email“
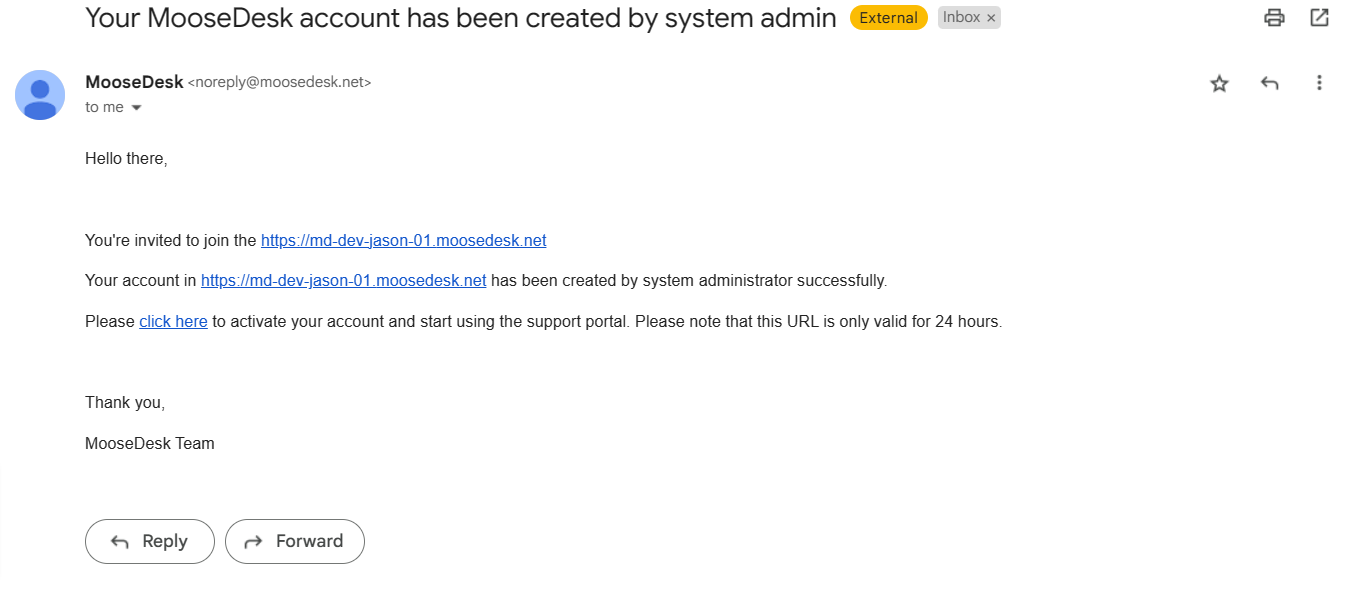
Step 5: The invited teammate will need to accept the invitation via email.
Note: For more details on how to accept the invitation and set up the MooseDesk account, you can refer to this article: How to accept an invite to MooseDesk workspace
Deactivating a teammate #
Step 1: Navigate to “Settings” > “People” > “Agents“
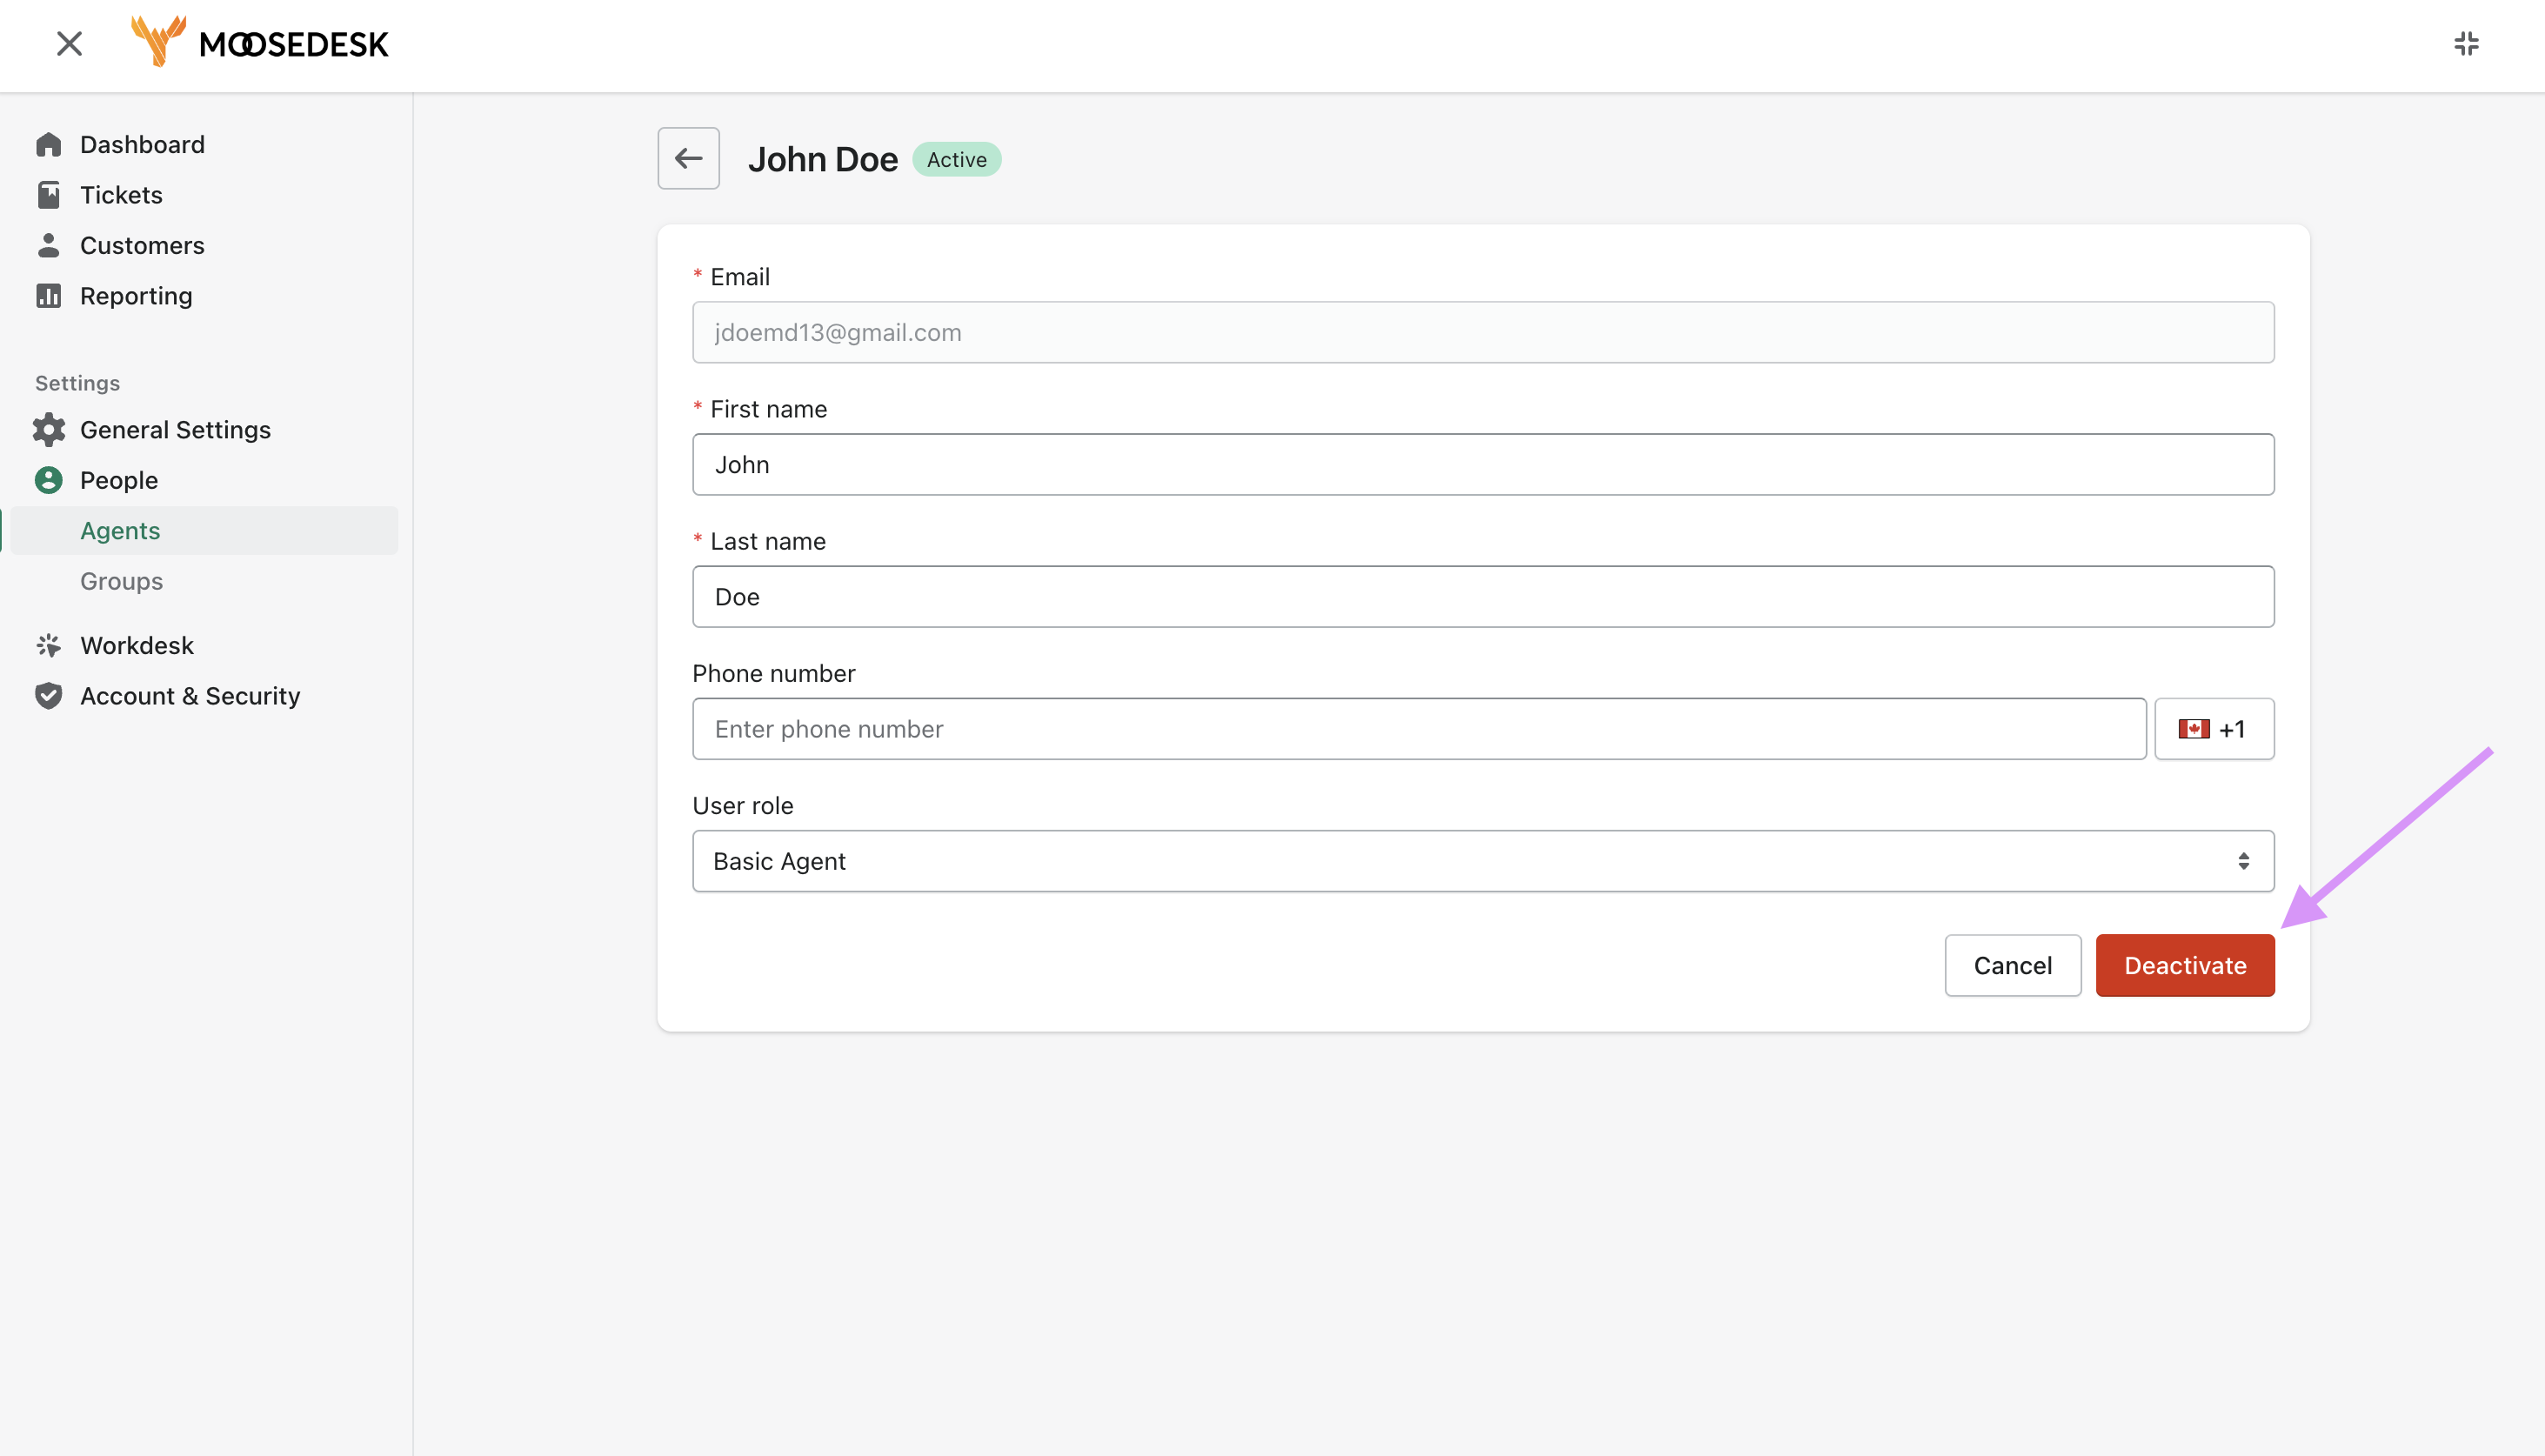
Step 2: Select the teammate you want to deactivate
Step 3: Click “Deactivate“
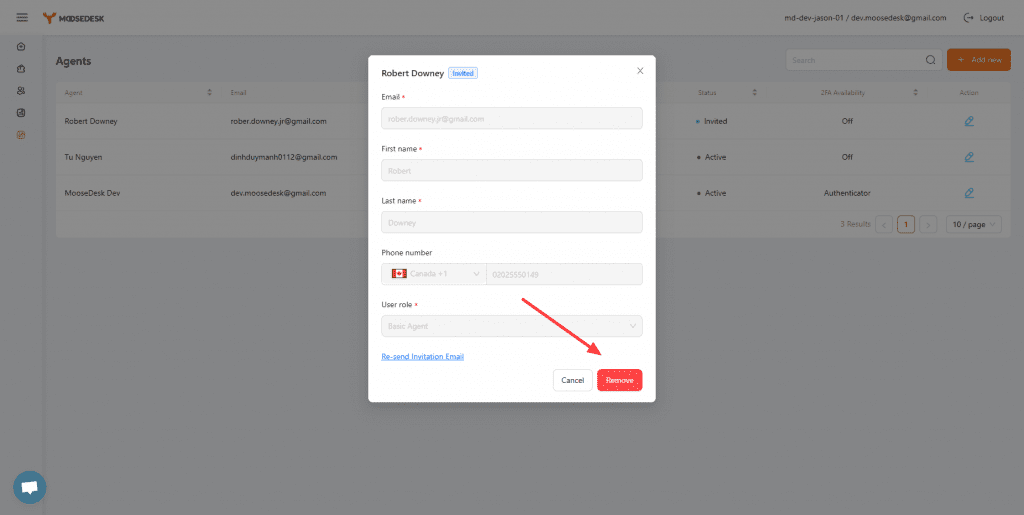
- If a teammate has not accepted the invitation email, you will see the “Remove“ option instead of “Deactivate“. This will permanently remove the teammate’s profile from the system.
- For existing teammates, once Deactivated, their profiles are still saved on the MooseDesk system.
- If you want to completely Remove an existing agent, please contact our support team and we will gladly assist you.
Support Channels #
If you ever need assistance, our Help Center is packed with comprehensive guides and tutorials.
At MooseDesk, we’re always here to help. Our dedicated email and live chat teams are available around the clock. Drop us an email at help@moosedesk.com, or click the Live Chat icon located at the bottom left corner of the MooseDesk Dashboard, our official website, and even within this Help Center.