The Help Widget is located at the bottom of your page, acting as a ticket-receiving gate for your help desk. Help Widget configuration involves setting up and customizing forms on your website that allow Customers to submit support requests or inquiries directly to the MooseDesk helpdesk system.
Set up and customize your Help Widget #
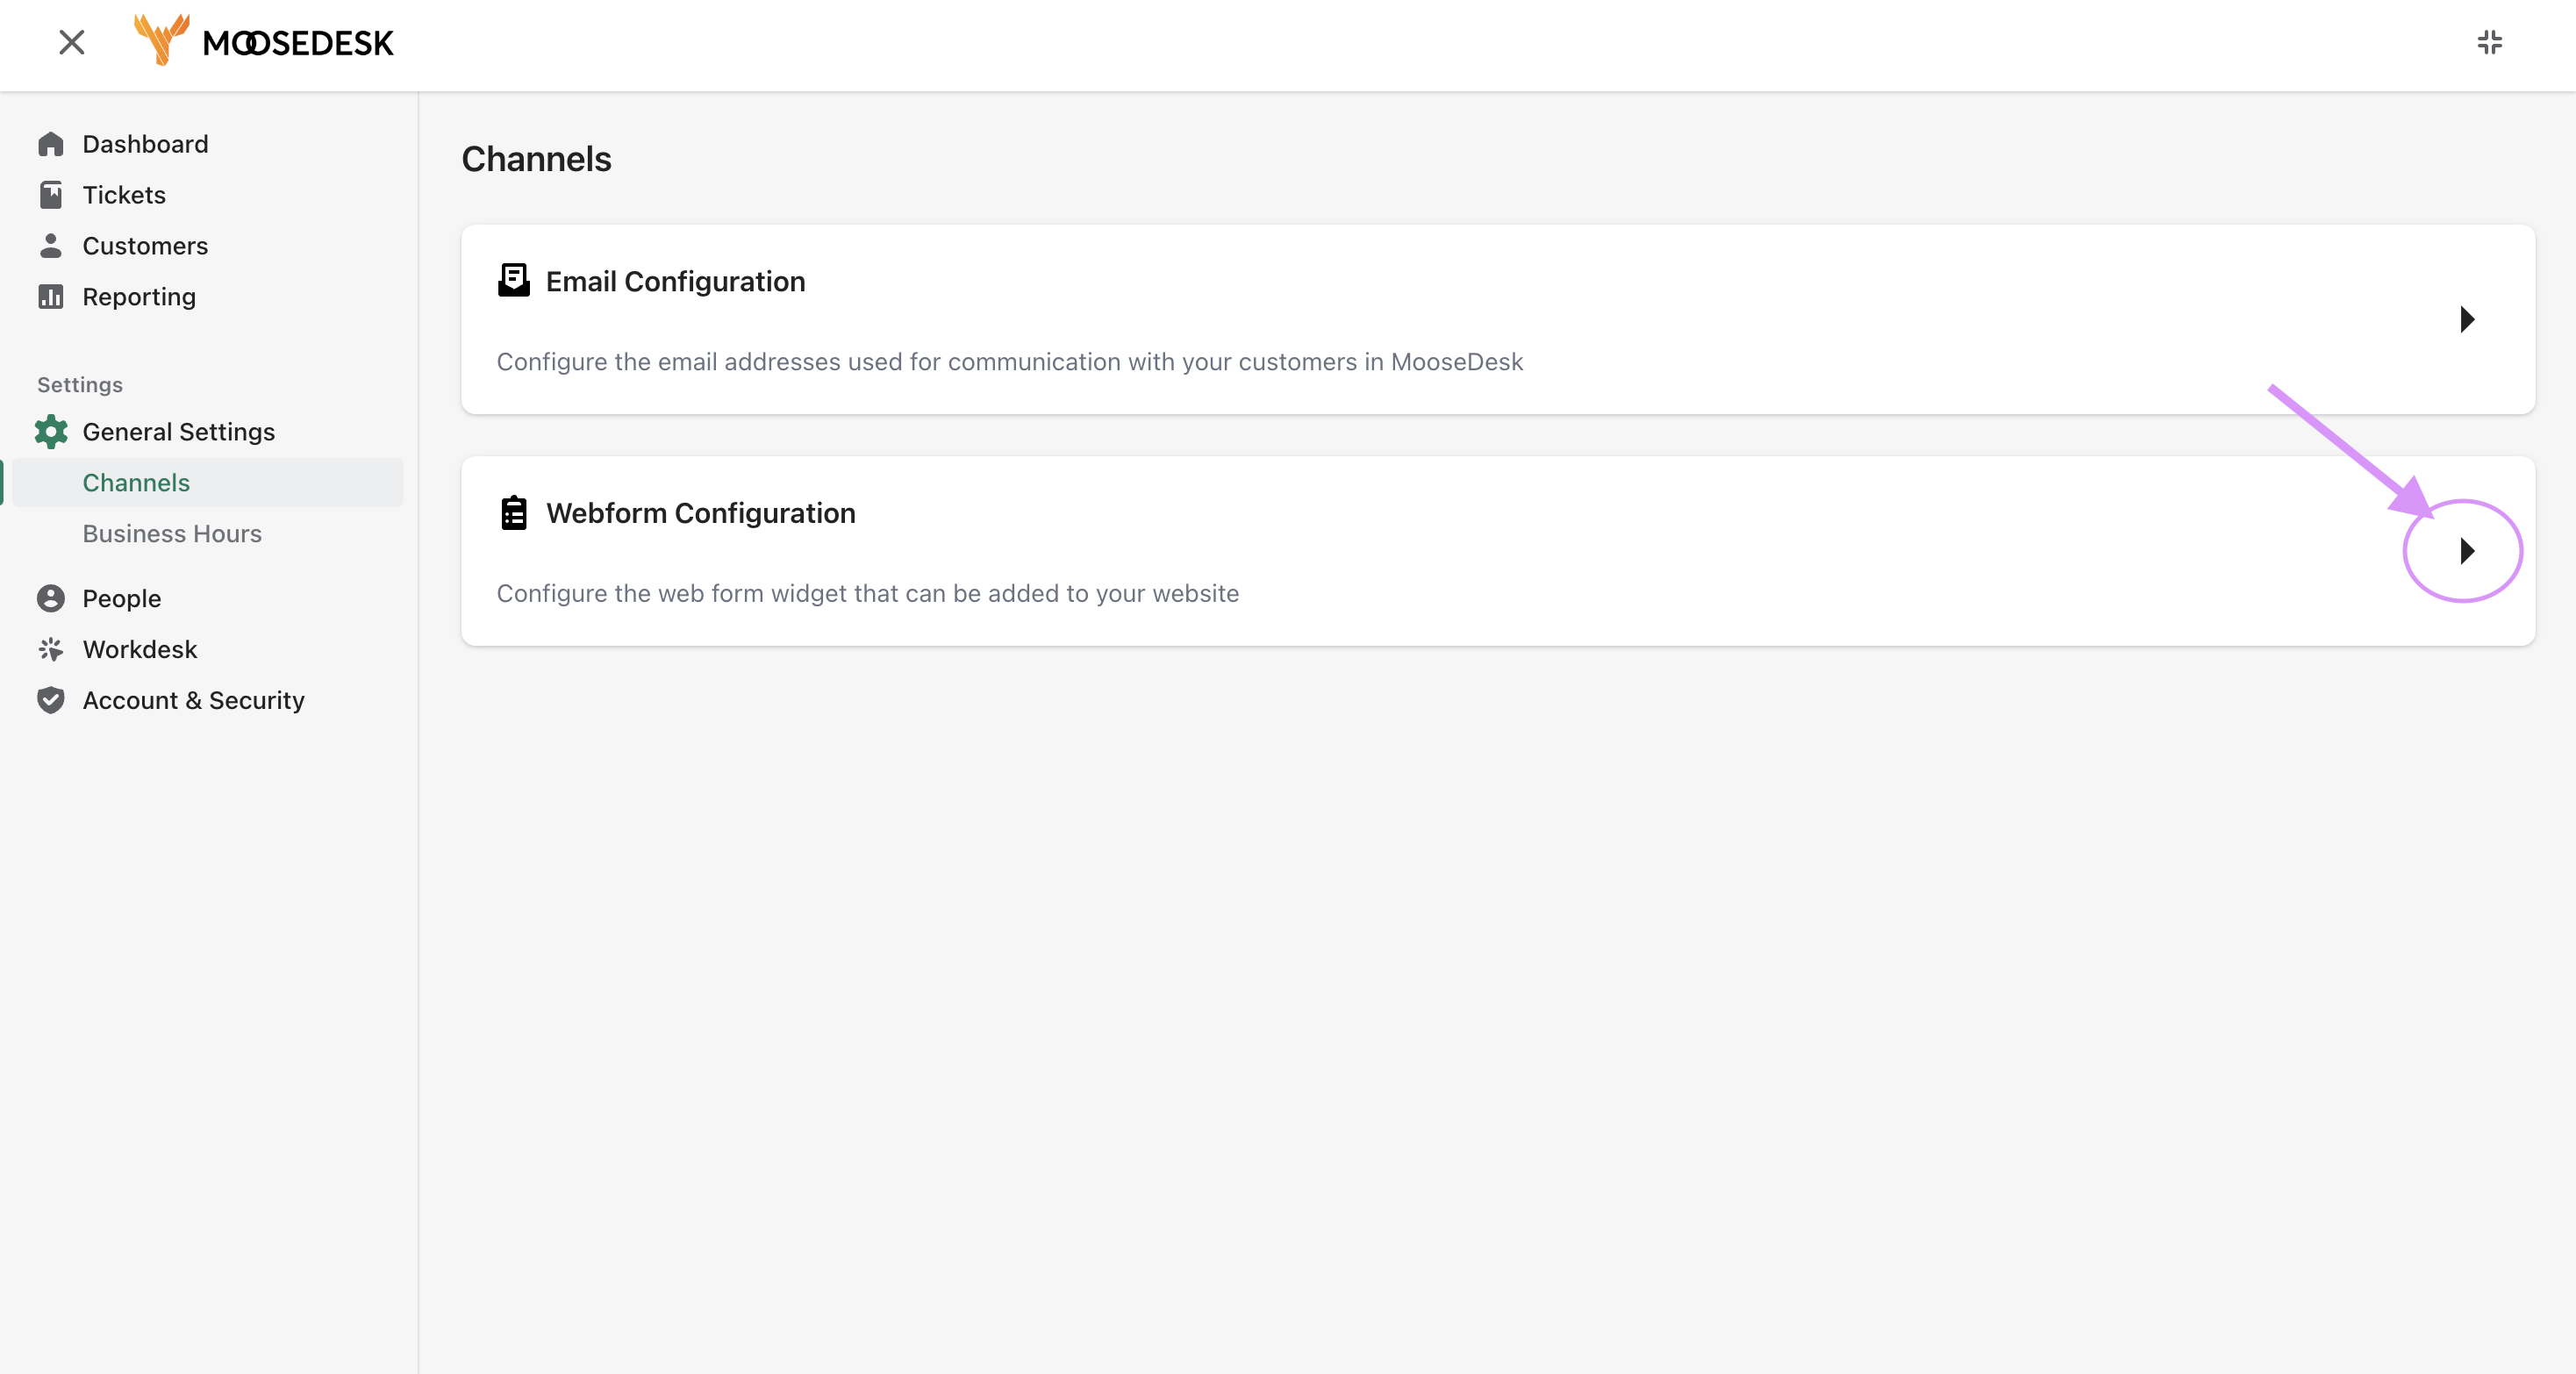
Step 1: Navigate to “Settings” > “Channels” > “Help Widget Configuration”
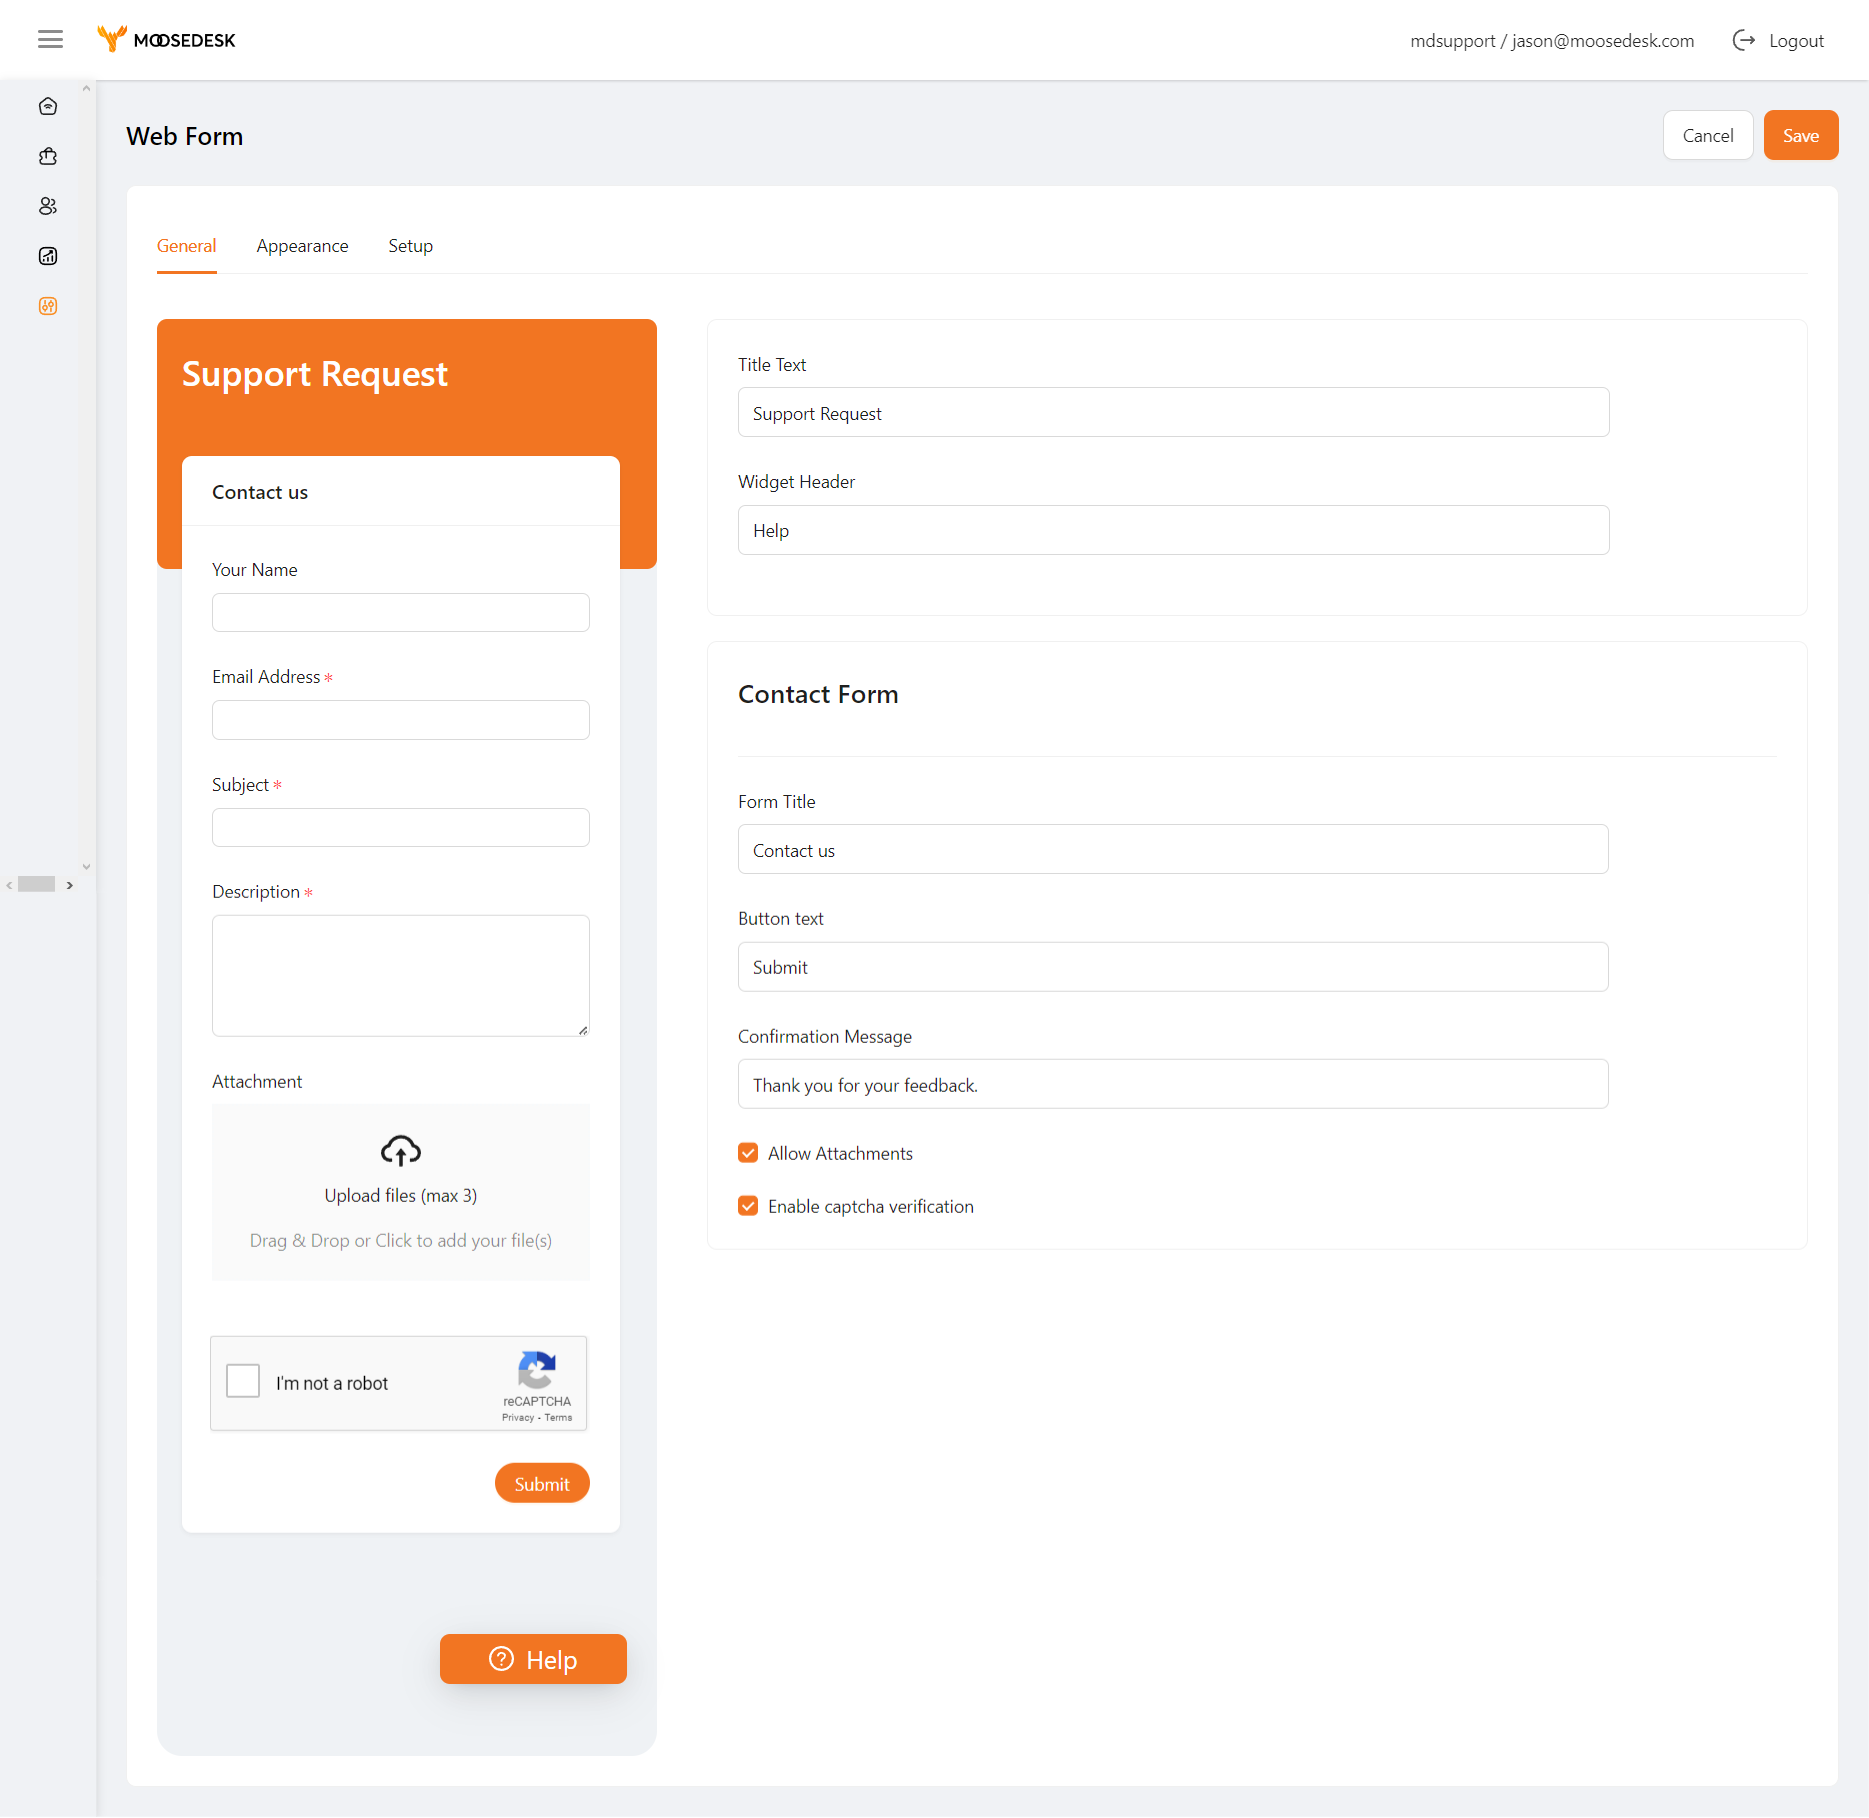
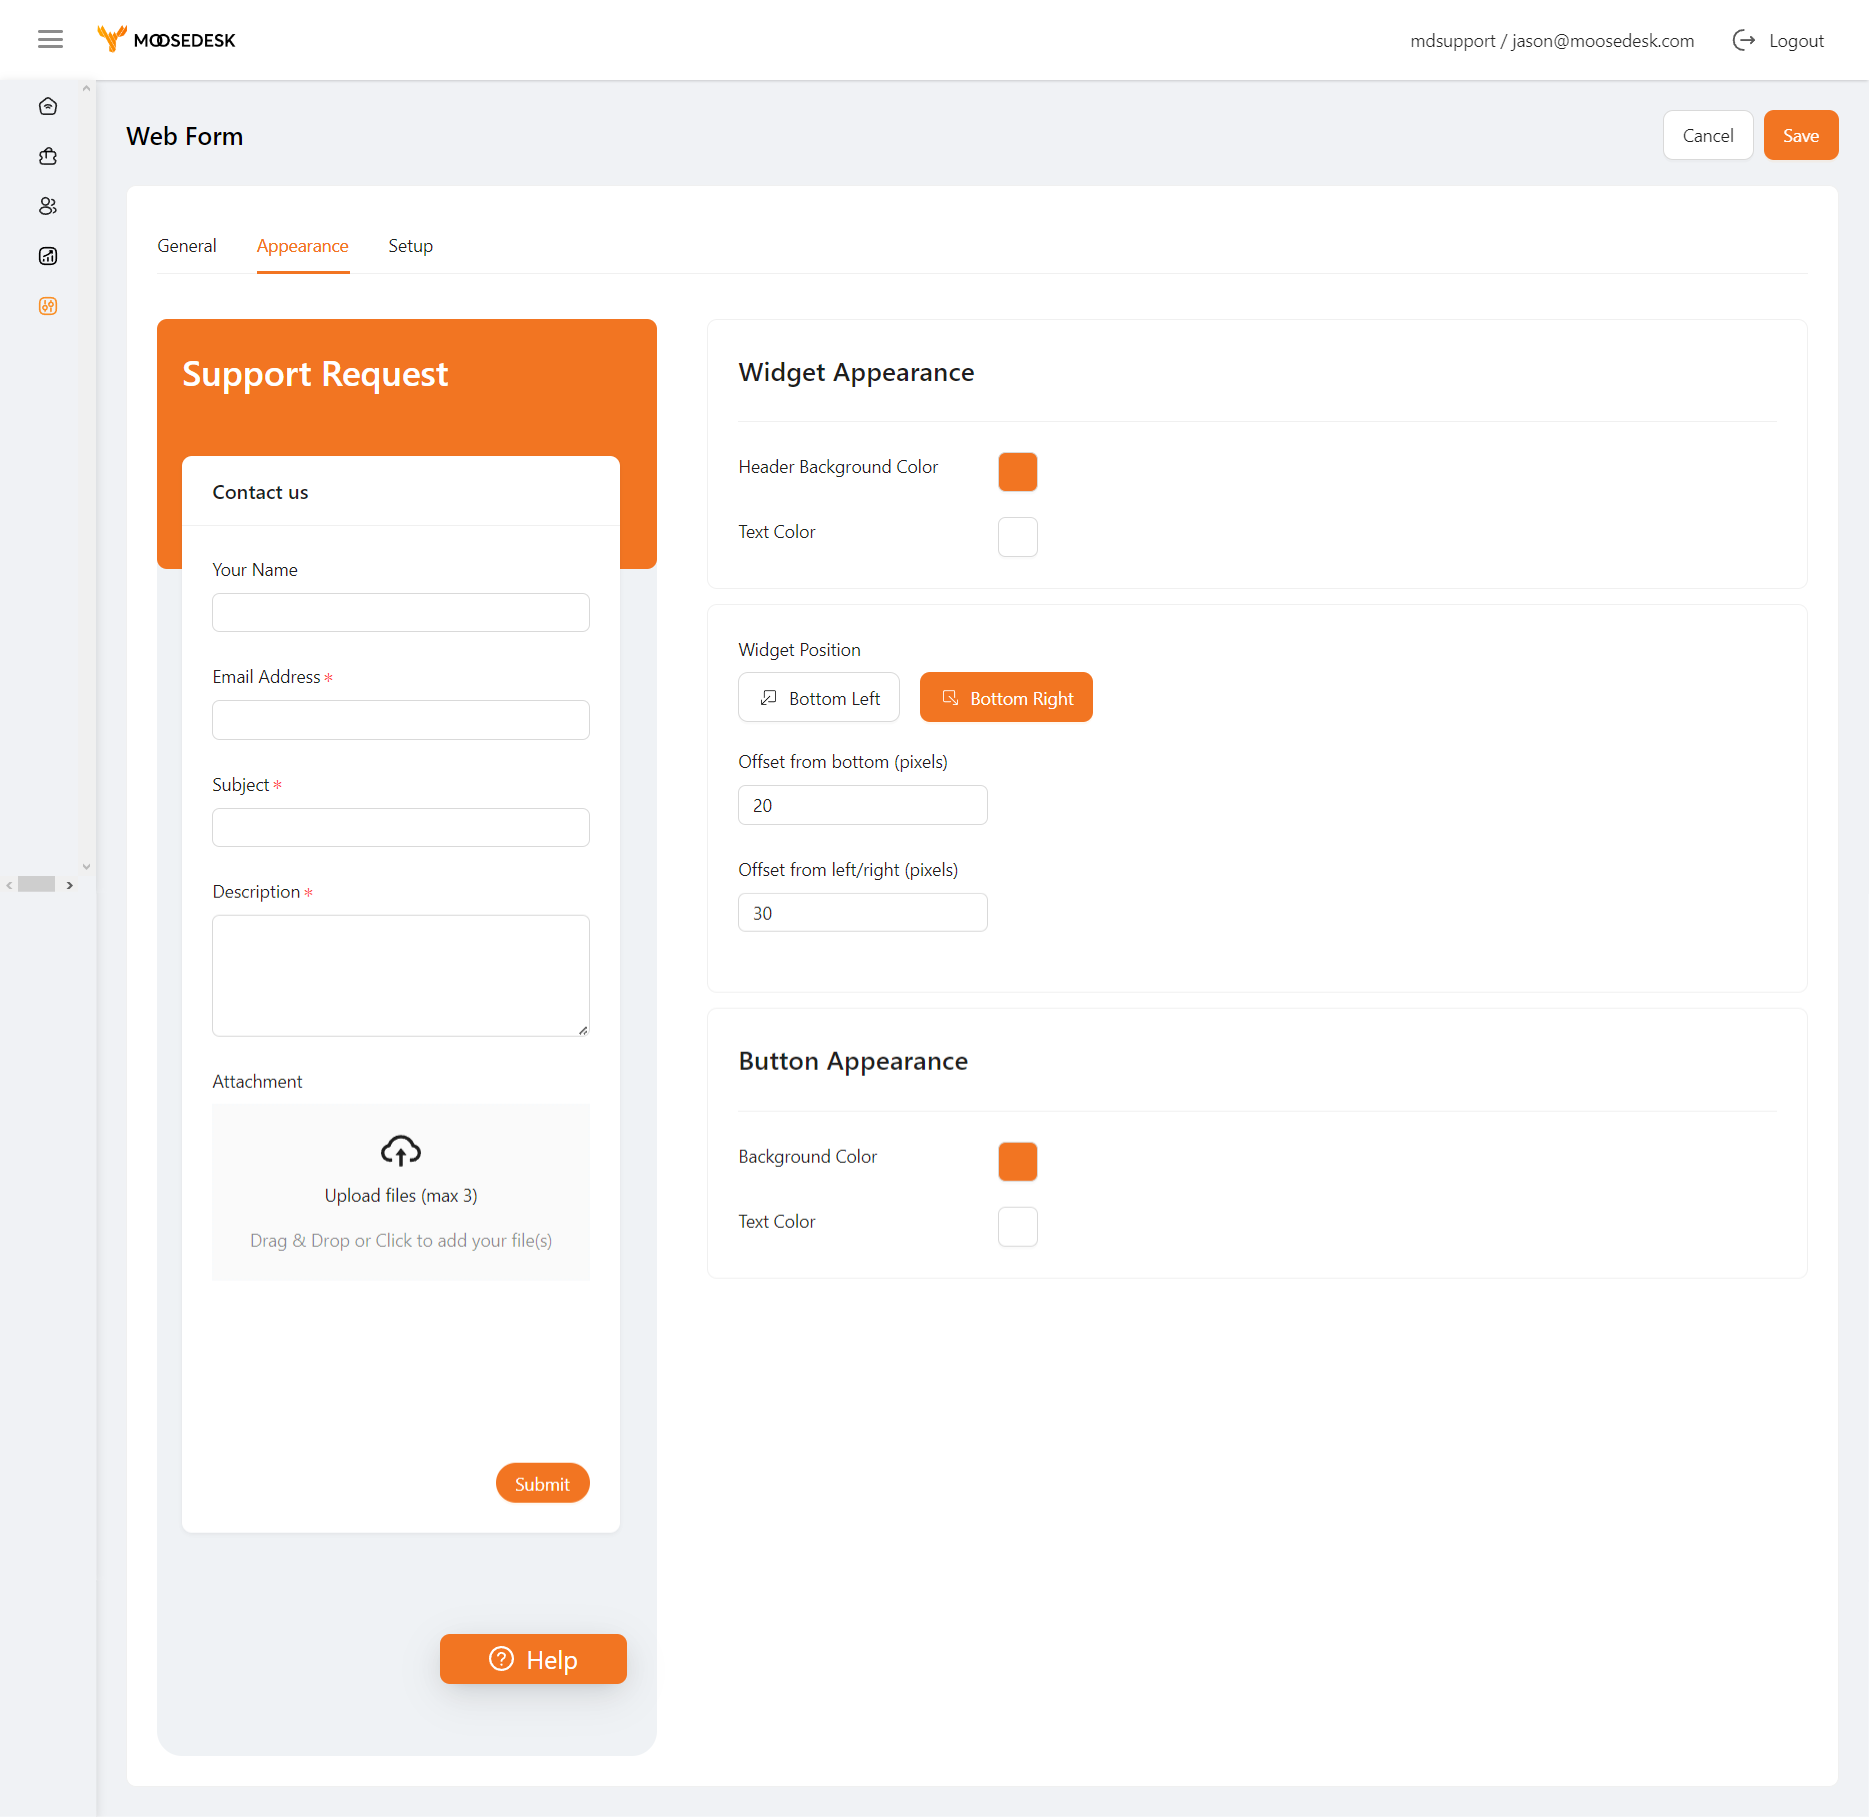
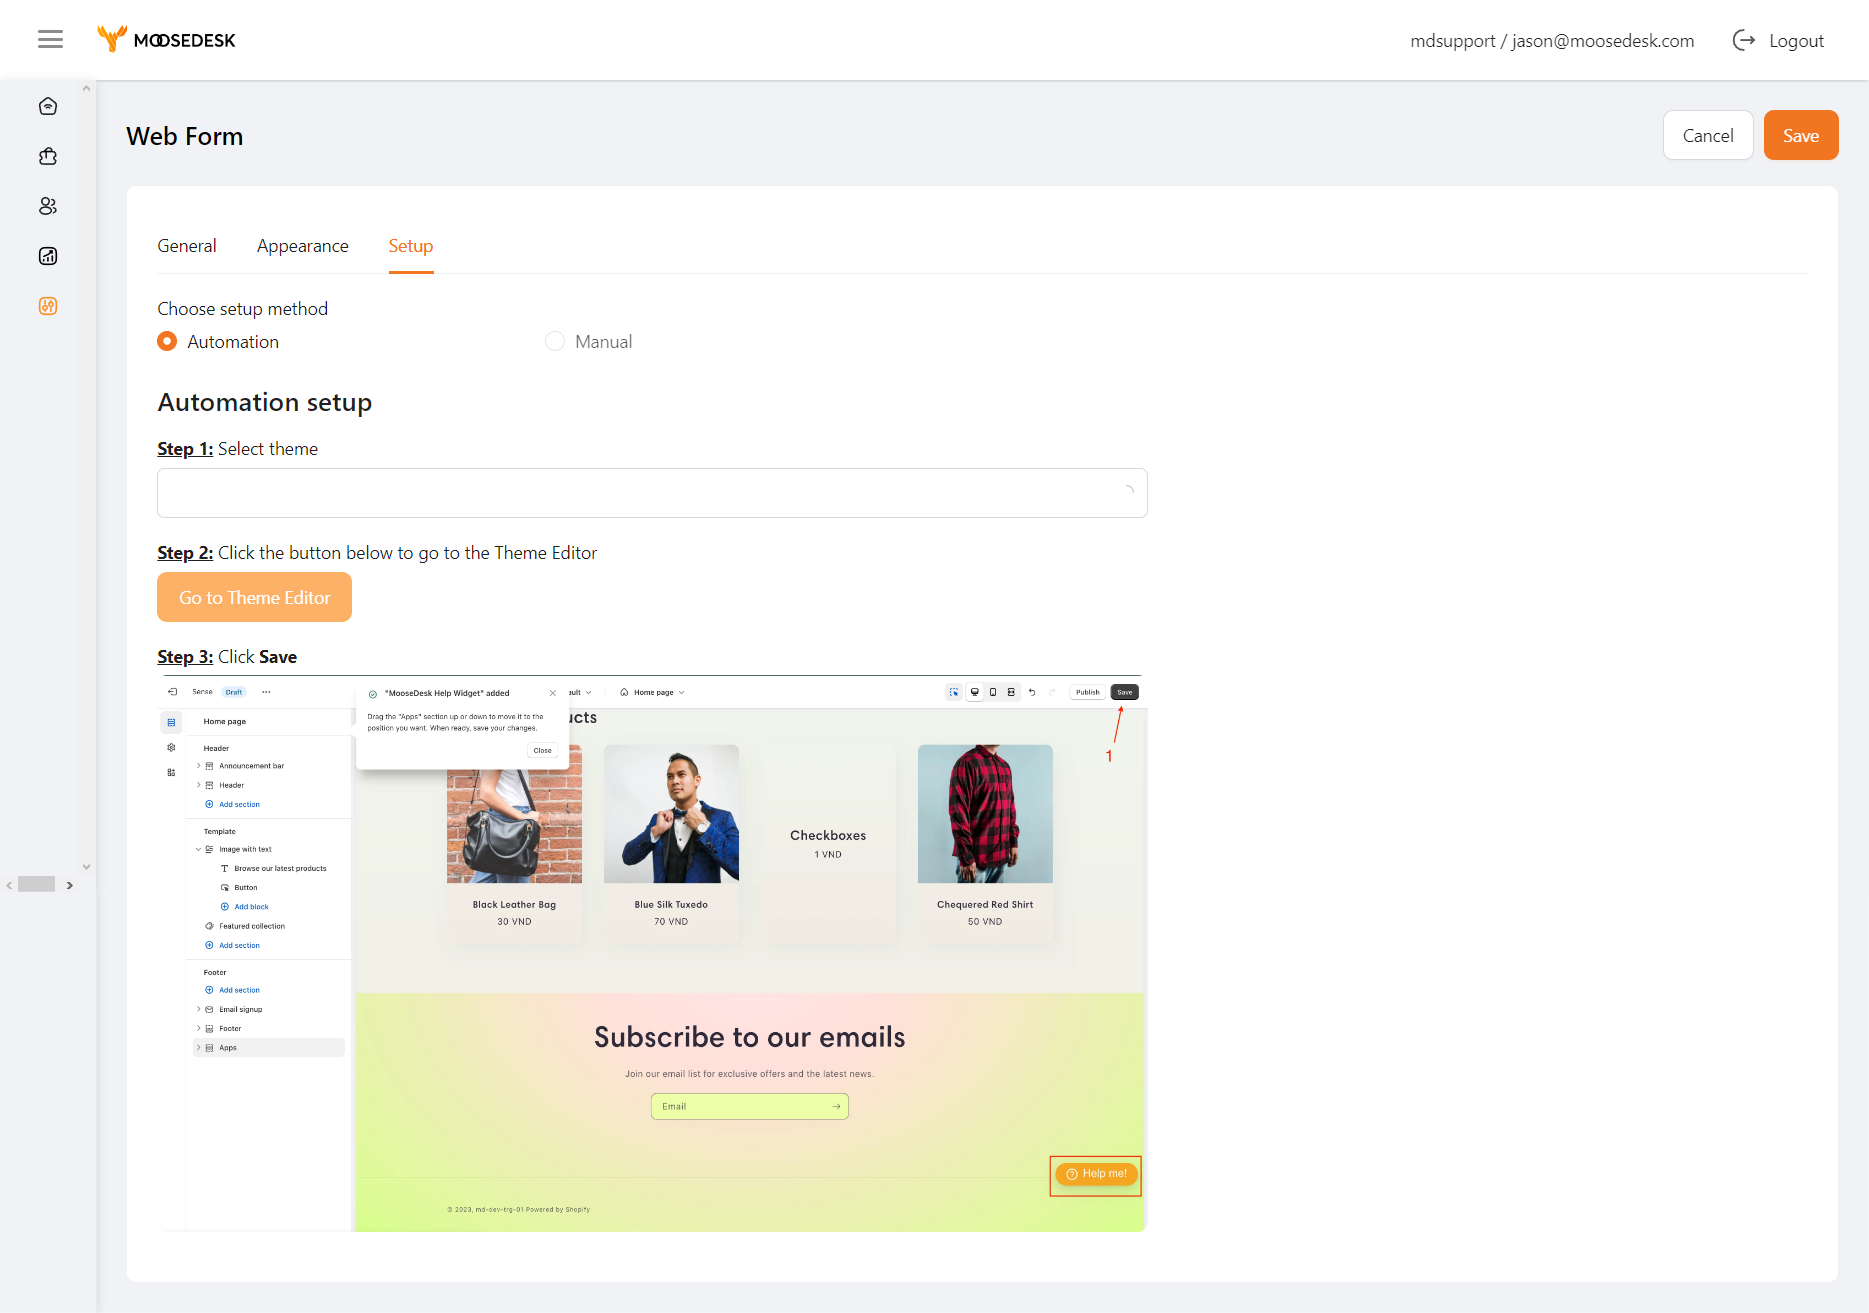
Step 2: You can start customizing your Help Widget with three different settings:
- The General tab allows you to make changes to the widget title, header, contact form, and your own logo
- The Appearance tab allows you to make changes text & background colors, widget position, and how the buttons look
- The Setup tab allows you to integrate the widget you just customized to your website. There are two ways you can integrate the widget – Automation and Manual. You can follow the in-app instructions to enable the integration.
Step 3: Once you have finished the customization, click “Save” and your widget is ready to go!

Support Channels #
If you ever need assistance, our Help Center is packed with comprehensive guides and tutorials.
At MooseDesk, we’re always here to help. Our dedicated email and live chat teams are available around the clock. Drop us an email at help@moosedesk.com, or click the Live Chat icon located at the bottom left corner of the MooseDesk Dashboard, our official website, and even within this Help Center.